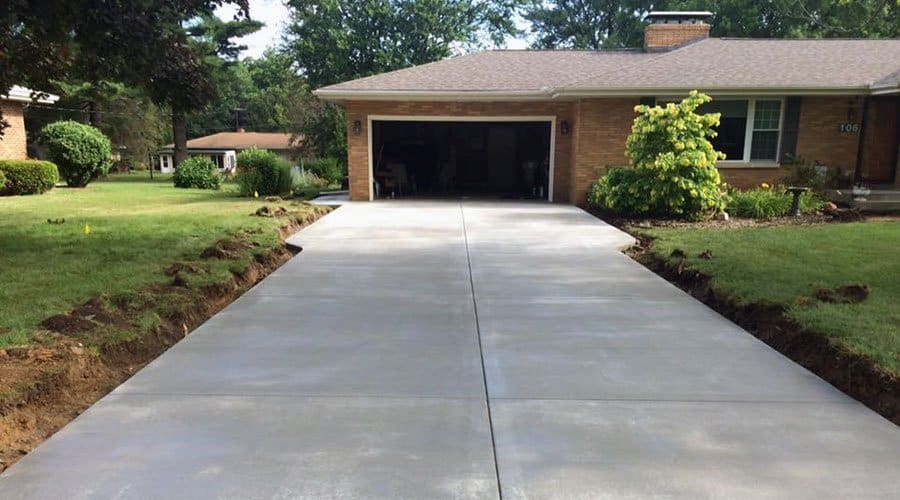
Most homeowners never see what actually goes into installing a concrete driveway. By the time concrete is poured, the most important work should already be done. Here’s what a proper driveway installation looks like, step by step.
1. Site Check and Planning
The contractor starts by looking at slope, drainage, access points, and how the driveway will be used. This helps determine thickness, layout, and whether any drainage work is needed.
2. Removing the Old Driveway or Excavating
If there’s existing concrete, it’s fully removed—not poured over. For new driveways, soil is excavated to the right depth so the driveway won’t settle later.
3. Preparing the Ground
The soil underneath is compacted and leveled. Any soft spots are fixed. This step matters more than the concrete itself.
4. Installing the Base
Gravel or crushed rock is laid down and compacted. This base supports the concrete and helps water drain away.
5. Setting the Forms
Wood or metal forms define the driveway’s shape, edges, and slope. This ensures water runs away from the house and garage.
6. Adding Reinforcement
Rebar or wire mesh is placed where needed. This helps manage cracking and strengthens the slab.
7. Pouring the Concrete
Concrete is poured evenly and spread across the forms. Timing is important so the slab sets consistently.
8. Finishing the Surface
The surface is finished based on the chosen look—most often a broom finish. Joints are added to guide where cracks will form.
9. Curing Time
Concrete needs time to cure. Foot traffic is usually allowed within a day, but vehicles must wait several days.
10. Cleanup and Final Walkthrough
Forms are removed, the site is cleaned, and care instructions are provided.
A concrete driveway is not a small cosmetic upgrade. It is a permanent, load-bearing structure that affects curb appeal, drainage, daily use, and property value. Homeowners often underestimate how many decisions—and risks—are involved before concrete is even poured.
This guide walks through how a typical homeowner should approach hiring a contractor for a concrete driveway, what to look for, what services to expect, design considerations, and how to avoid costly mistakes. It is written as a one-stop reference and intended to serve as pillar content, with clear opportunities to branch into supporting articles.
Step 1: Defining the Project Before Calling Contractors
Before contacting any contractor, homeowners should have a rough idea of what they want. This does not require technical knowledge, but clarity helps avoid vague quotes and change orders later.
Key questions to answer upfront:
Is this a replacement or a brand-new driveway?
Will the driveway be standard broom finish, decorative, or exposed?
Are there drainage issues, slope concerns, or pooling water?
Will it support heavy vehicles (trucks, RVs, trailers)?
Are permits likely required in the city or county?
Even simple answers help contractors provide realistic proposals instead of guesswork pricing.
Step 2: Finding and Shortlisting Contractors
Most homeowners start with:
Google search
Google Maps listings
Referrals from neighbors
Local contractor websites
At this stage, quantity matters less than quality. Narrow the list to 3–5 contractors that specialize in concrete flatwork, not general “handyman” services.
Red flag early on
If a contractor:
Cannot clearly explain their concrete process
Avoids written estimates
Pushes for cash only
Cannot show recent driveway work
Move on.
Step 3: Verifying License, Bond, and Insurance (Non-Negotiable)
This is where many homeowners cut corners—and regret it later.
What to verify
Contractor license Confirms the contractor is legally allowed to perform concrete work in your state.
Bond Protects the homeowner if the contractor fails to complete the job or violates contract terms.
General liability insurance Covers damage to property, utilities, or neighboring structures.
Workers’ compensation insurance Prevents homeowner liability if a worker is injured on site.
A legitimate contractor will provide this information without hesitation. If they resist, that is your answer.
Step 4: Understanding What Services a Concrete Driveway Contractor Should Provide
A professional driveway contractor does more than “pour concrete.”
Core services you should expect
Site evaluation and measurement
Removal of existing driveway (if applicable)
Proper subgrade preparation and compaction
Base material installation (gravel or crushed rock)
Forming and edge control
Reinforcement (rebar or wire mesh where appropriate)
Concrete placement and finishing
Control joints or saw-cut joints
Cleanup and disposal
Final walkthrough
If these steps are not clearly explained in the estimate, the contractor may be cutting corners.
Step 5: Subgrade and Base Preparation — The Most Ignored Step
Concrete does not fail because it is weak. It fails because what is under it was done poorly.
A quality contractor will:
Excavate to proper depth
Compact native soil
Install and compact base material in lifts
Address soft spots or expansive soils
Plan drainage flow away from the slab
Homeowners should ask directly:
“How do you prepare the base before pouring concrete?”
If the answer is vague, be cautious.
Step 6: Concrete Thickness, Reinforcement, and Load Expectations
Not all driveways are equal.
Key considerations:
Typical residential thickness: 4 inches
Heavy vehicle or commercial use: 5–6 inches
Reinforcement options:
Rebar
Wire mesh
Fiber-reinforced concrete (supplemental, not a replacement)
A good contractor explains why they recommend a certain thickness or reinforcement—not just what they use by default.
Most homeowners think design means stamped concrete. In reality, design starts with layout.
Functional design decisions
Driveway width and turning radius
Approach slope to garage
Drainage channels or swales
Walkway integration
RV or side parking pads
Finish and aesthetic options
Broom finish (most common and practical)
Light texture or salt finish
Colored concrete
Stamped or decorative borders
Exposed aggregate
A responsible contractor will explain maintenance, slip resistance, and long-term durability—not just appearance.
Step 8: Permits, Inspections, and Local Codes
Many municipalities require permits for:
Driveway replacements
Curb cuts
Drainage modifications
Public sidewalk tie-ins
Homeowners should clarify:
Who pulls the permit?
Are inspections required?
Are city fees included in the estimate?
If a contractor suggests skipping permits “to save time,” that is a liability risk for the homeowner.
Step 9: Timeline, Scheduling, and Weather Realities
Concrete is weather-sensitive.
A realistic contractor will:
Provide a general timeline (not rigid promises)
Schedule pours based on temperature and conditions
Explain curing time and access restrictions
Provide guidance on when vehicles can return
Expect transparency, not guarantees that ignore weather.
Step 10: Warranty, Maintenance, and What Comes After the Pour
Concrete is durable, but not maintenance-free.
Ask about:
Workmanship warranty
Crack expectations (concrete cracks—control is the goal)
Sealing recommendations
Cleaning and care instructions
A professional contractor educates homeowners on long-term care instead of overselling “crack-proof” claims.
Common Mistakes Homeowners Make
Choosing the lowest bid without understanding scope
Ignoring base preparation details
Not verifying license and insurance
Focusing only on finish, not structure
Allowing rushed pours without proper prep
A driveway should last decades. Cutting corners upfront shortens that lifespan dramatically.
Final Thoughts: Choosing Confidence Over Convenience
Hiring a concrete driveway contractor is not about speed or price alone. It is about choosing a professional who understands structure, drainage, code compliance, and long-term performance.
Homeowners who ask the right questions, verify credentials, and understand the process end up with a driveway that performs as well as it looks.