Installation and Construction

Installation and construction guides that explain project phases, prep work, and the build details that affect performance over time.

Start with the service type

Landscaping Services Guideposts

Use these guides to understand what each service includes before comparing providers or requesting quotes.

Core service explainers

Start here when you are still deciding what kind of landscaper or outdoor contractor you need.

Compare before you hire

Use these pages when two services or surface choices sound similar but lead to different scopes.

Hire smarter

Planning And Contractor Comparison

Use this hub when you are moving from ideas into estimates, bids, and contractor conversations.

Before requesting estimates

These guides help define scope and compare companies before the first site visit.

Budget with better assumptions

Cost Guides And Calculators

Use this hub to move from rough budget ranges into the details that usually change quotes.

Calculator starting points

Open the calculator hub or a cost guide when you need a quick planning range.

High-impact cost decisions

These pages help compare choices where price, lifespan, and maintenance tradeoffs matter.

Understand the build

Installation And Site-Work Pathways

Use these guides to understand sequencing, site prep, access, and the details that affect long-term performance.

Hardscape and site prep

These projects often depend on base prep, demolition, grading, drainage, and access.

Drainage and retaining work

Use these when water, grade, or slope stability is part of the project.

Choose materials with ownership in mind

Material And Finish Decision Paths

Use these guides when appearance, maintenance, replacement, and budget all affect the right material choice.

Surface and finish comparisons

Compare outdoor surfaces before committing to a driveway, patio, or lawn direction.

Landscape material planning

Use these pages when quantity, delivery, or long-term maintenance are the main concern.

Protect the investment

Maintenance And Ownership Next Steps

Use these guides to understand ongoing care, seasonal refreshes, and when maintenance points to a bigger fix.

Maintenance planning

These guides help compare recurring service, seasonal work, and refresh projects.

When upkeep becomes repair

Use these when repeated maintenance problems suggest drainage, surface, or material issues.

  • Retaining Wall Guide for Homeowners

    Retaining Wall Guide for Homeowners

    Retaining walls can solve slope problems, create usable yard space, support patios and walkways, and help control erosion. They can also fail early if homeowners treat them like a simple decorative add-on instead of a structural landscape feature. The look of the wall matters, but performance depends on base work, drainage, soil pressure, and how the wall fits into the grade of the property.

    This guide helps homeowners understand what retaining walls actually do, what affects cost and durability, and what to ask before hiring.

    What a retaining wall is meant to do

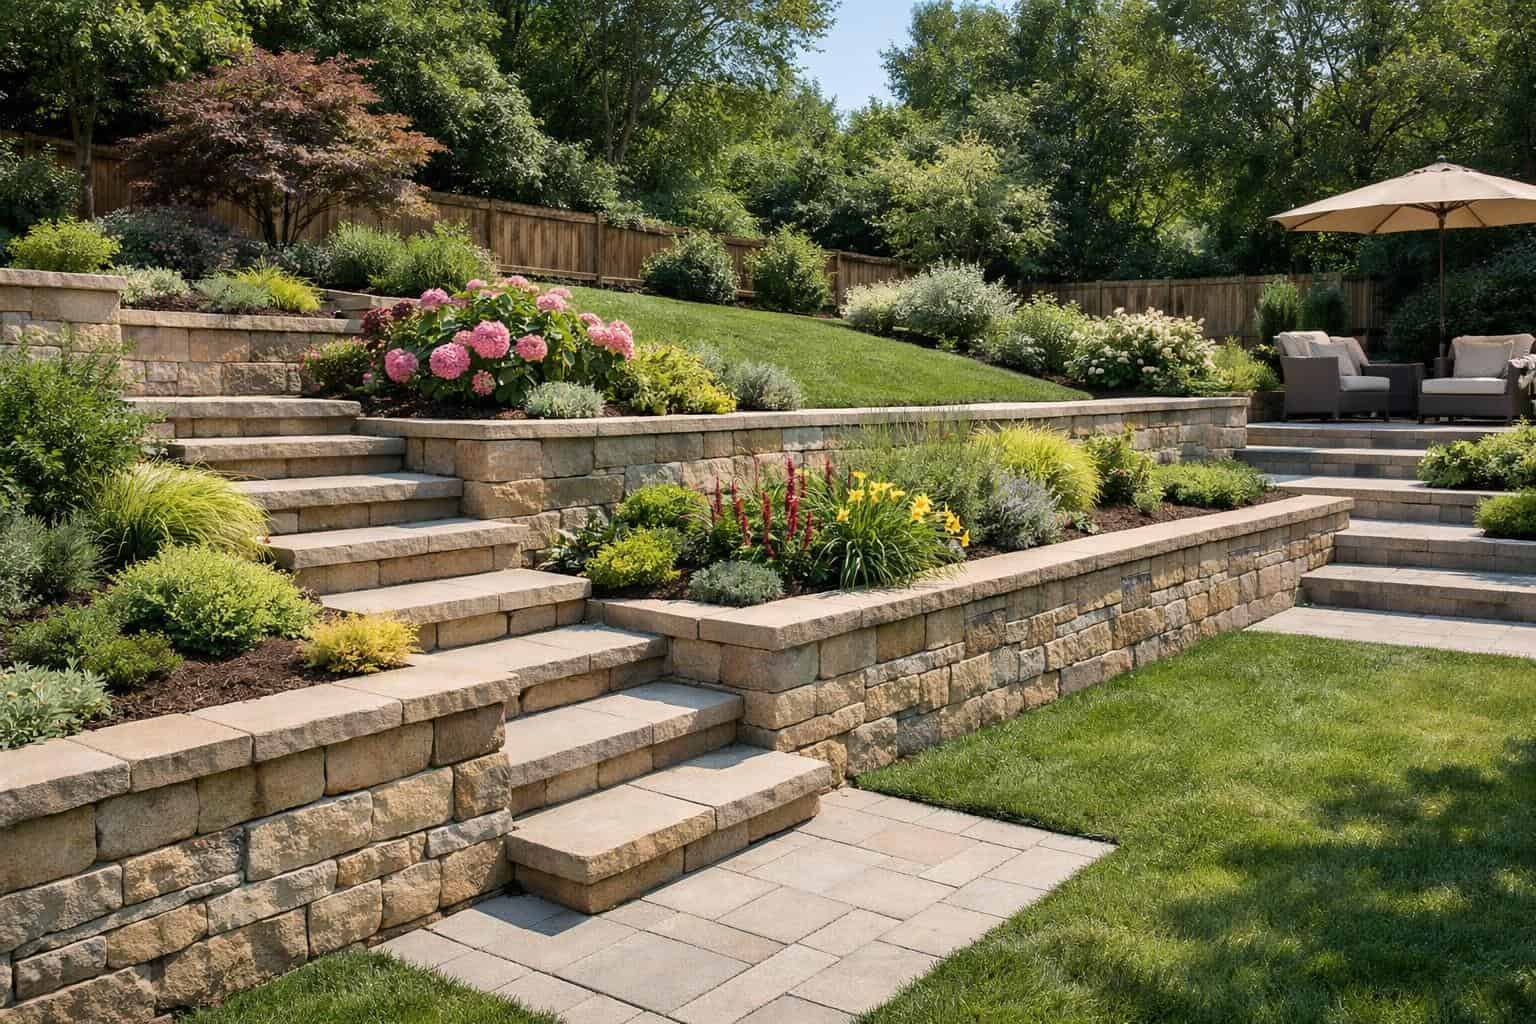
    A retaining wall holds back soil where there is a change in elevation. On some properties that means preventing erosion on a slope. On others it means carving out space for a patio, lawn, planting area, driveway edge, or walkway. The right wall can make a yard feel dramatically more usable.

    Because retaining walls manage both structure and water, they should be planned with drainage and surrounding surfaces in mind. A wall that looks good but traps water or sits on a poorly prepared base is much more likely to shift, lean, or fail over time.

    Common residential retaining wall materials

    • Segmental block systems: popular for many residential projects because they are modular and widely available.
    • Poured concrete: sometimes used when a cleaner or more engineered appearance is preferred.
    • Natural stone: can create a more organic look, but may increase labor and design complexity.
    • Timber: used in some settings, though homeowners should think carefully about longevity and maintenance.

    The best choice depends on wall height, site conditions, visual goals, and budget.

    Why drainage is critical behind the wall

    Many wall problems are really water problems. When runoff or trapped moisture builds up behind a wall, pressure increases and performance declines. That is why drainage provisions are not optional details. They are part of the core structure.

    If your property already has pooling or runoff issues, read our drainage solutions guide alongside this page. The two scopes are often connected.

    What affects retaining wall cost

    Wall pricing is shaped by more than visible length. Height, access, excavation, soil conditions, drainage needs, reinforcement, material choice, and how the wall interacts with nearby surfaces all matter. A short but difficult site can cost more than a longer wall with easy access and straightforward grading.

    Retaining Wall Guide for Homeowners related example showing Retaining wall detail relevant to planning mistakes, drainage, and grade behavior
    This retaining wall example gives homeowners a visual reference for comparing layout, materials, and maintenance tradeoffs before starting the project.
    • Major cost drivers: wall height, excavation depth, drainage components, reinforcement needs, access, and finish material.
    • Project combinations that raise scope: stairs, patio integration, driveway edge support, lighting, and planting bed rebuilds.

    If you are comparing broader outdoor budgets, our landscaping costs guide can help you interpret quotes more realistically.

    When a retaining wall belongs in a larger plan

    Retaining walls rarely function best as isolated projects. They often support a larger outdoor design by creating a level area for a patio, improving circulation, stabilizing a driveway edge, or organizing planting spaces more effectively.

    This is where site planning matters. Our landscaping services guide explains how structural services often need to be sequenced with drainage, patios, planting, and lighting rather than handled one at a time without a bigger plan.

    Questions to ask before hiring for a retaining wall

    • How will you handle drainage behind and around the wall?
    • What base preparation and reinforcement are included?
    • How does this wall connect to nearby patio, walkway, or lawn grades?
    • What material do you recommend for this site and wall height?
    • What signs of movement or settlement should I watch for later?

    It also helps to review questions to ask before hiring a landscaper before comparing proposals.

    What homeowners should remember

    A retaining wall is one of the clearest examples of landscaping as both design and construction. It should look appropriate for the property, but it also needs to manage soil pressure, water, and long-term stability. The more clearly a contractor explains drainage, base work, and how the wall supports the rest of the yard, the more confidence you can have in the installation.

    Retaining Wall Guide for Homeowners related example showing Residential retaining wall installation scene with excavation, blocks, and slope conditions
    This related retaining wall detail helps show how site conditions and finish choices can change the homeowner's plan.

    Compare materials: Homeowners deciding between modular block and a smoother structural look can review the Retaining Wall Block vs Poured Concrete Guide before choosing a system.

    Related guide: If you are seeing movement or cracking already, the Signs a Retaining Wall May Be Failing Guide explains what to watch for next.

    Cost guide: If you are comparing estimates for this kind of project, the What Affects Retaining Wall Cost Guide explains why site conditions and drainage can change the number quickly.

    Timeline guide: If schedule matters as much as budget, the How Long Does a Retaining Wall Project Take Guide explains where time tends to go.

    Quote guide: The retaining wall quote guide helps homeowners compare bids by drainage, reinforcement, and site assumptions instead of price alone.

    Expectations guide: The retaining wall expectations guide helps homeowners understand excavation, drainage detail, backfill, and finish grading during the project.

    Maintenance guide: The retaining wall maintenance guide helps homeowners monitor drainage behavior, movement, and surface change over time.

    Mistakes guide: The retaining wall planning mistakes guide helps homeowners catch drainage and grade mistakes before construction begins.

    Warning signs guide: The retaining wall warning signs guide helps homeowners judge leaning, bulging, cracking, and drainage-related changes early.
    More Service Planning Guides


  • Drainage Solutions Guide for Homeowners

    Drainage Solutions Guide for Homeowners

    Drainage problems are easy to ignore until they start damaging the parts of the property homeowners care about most. Pooling water, soggy lawn edges, washed-out mulch, slippery walkways, runoff toward the garage, and erosion near retaining walls are all signs that water is moving the wrong way. Once those issues start affecting hardscapes, planting beds, or the foundation, they usually get more expensive to fix.

    This guide explains the most common residential drainage solutions, when homeowners should address water problems before other upgrades, and what to ask a contractor when drainage is part of the project scope.

    Signs a yard needs drainage work

    Not every wet spot means a full drainage system is needed, but recurring water issues usually point to a bigger grading or runoff problem. The key is to watch what happens after heavy irrigation or rainfall, not just how the property looks on a dry day.

    • Water stands in the yard long after rain stops.
    • Mulch or soil washes out from planting beds.
    • Water collects near the house, garage, or patio edge.
    • Lawn areas stay muddy or soft when surrounding areas dry out.
    • Walkways, driveways, or retaining walls show signs of undermining or settlement.

    Common residential drainage solutions

    The right drainage fix depends on what kind of water you are dealing with. Surface runoff, roof discharge, oversaturated planting beds, and low spots in the lawn do not always need the same solution.

    • Grading corrections: reshape the surface so water flows away from structures and gathering areas.
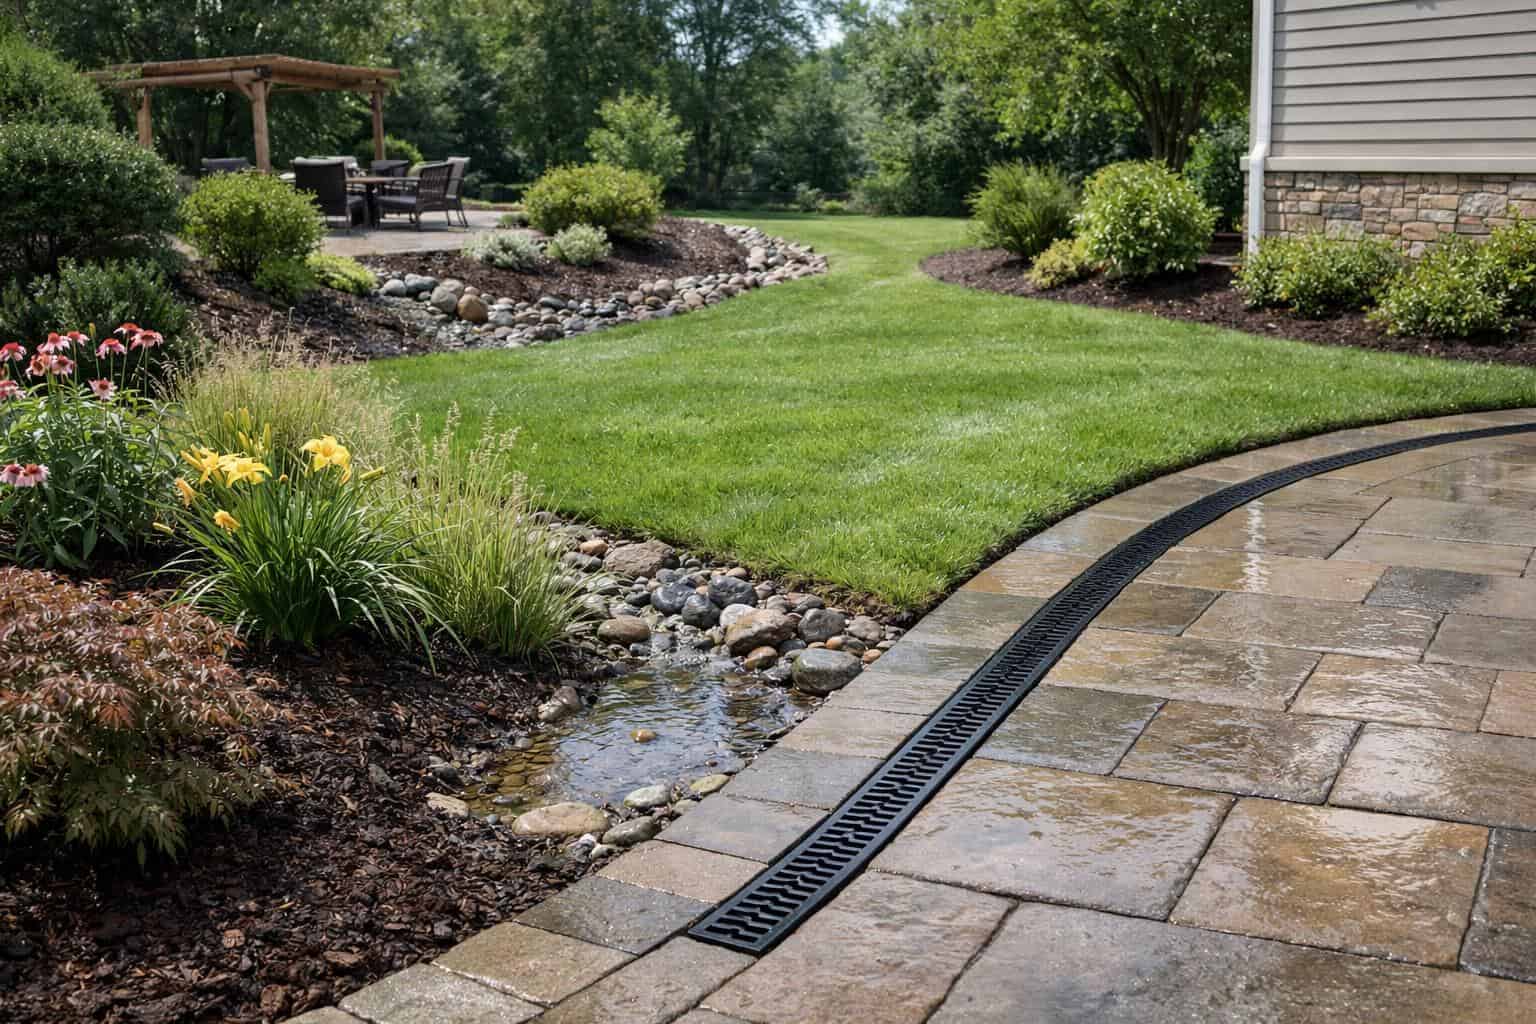
    • Channel drains and catch basins: collect and redirect water from hardscape areas where flow concentrates.
    • French drains: help intercept subsurface or slow-moving water in some landscape conditions.
    • Downspout extensions: move roof runoff away from the immediate foundation zone.
    • Swales and surface pathways: guide water across the property in a controlled way.

    Some projects use more than one method because the problem is not a single low spot, but a larger site-planning issue.

    Why drainage should often come before other upgrades

    Homeowners sometimes want to start with the visible improvements first: a patio, new lawn, walkway, or planting beds. But if water movement is already poor, finishing surfaces before fixing drainage can shorten the life of everything that follows.

    Drainage Solutions Guide for Homeowners related example showing Drainage detail relevant to pooling, runoff shifts, and warning signs
    This drainage example gives homeowners a visual reference for comparing layout, materials, and maintenance tradeoffs before starting the project.

    Drainage is often part of the structural side of landscaping. It belongs in the same planning conversation as patios, retaining walls, and access surfaces because those features all depend on stable grades and predictable runoff.

    How contractors evaluate drainage problems

    A strong contractor should look beyond the obvious puddle. They should be paying attention to slope, elevation changes, hardscape edges, downspout discharge, soil conditions, and where water is likely entering or concentrating across the site.

    • Where does the water start?
    • Where is it supposed to go?
    • What surfaces or beds are interrupting that movement?
    • Are there signs of settlement, erosion, or poor compaction nearby?

    Those questions usually tell you more than a fast suggestion to “just add a drain.”

    Drainage work and project cost

    Drainage can feel expensive because much of the value is invisible once the job is complete. But invisible does not mean optional. The cost usually reflects excavation, pipe or collection components, grading labor, disposal, and the coordination needed to make water move correctly without creating a new problem elsewhere on the property.

    If you are reviewing bids, our landscaping costs guide can help you compare scope more accurately.

    Questions to ask before approving drainage work

    • What is causing the water issue in the first place?
    • How will this solution move water away from the problem area?
    • Does this fix depend on changes to slope, hardscape, or downspouts elsewhere?
    • Will this work protect nearby patios, walkways, lawn, or planting beds over time?
    • What maintenance should I expect for this drainage setup?

    What homeowners should remember

    Drainage is not just a cleanup issue. It is a performance issue that affects patios, lawns, retaining walls, planting beds, and even the structure itself. If a contractor explains the water path clearly and shows how the solution fits into the broader landscape, you are much more likely to end up with a fix that lasts instead of a temporary patch.

    Drainage Solutions Guide for Homeowners related example showing Drainage detail relevant to planning mistakes, runoff diagnosis, and grading decisions
    This related drainage detail helps show how site conditions and finish choices can change the homeowner's plan.

    If you are unsure whether the real fix is collection drains, surface reshaping, or both, our drainage vs regrading guide can help you compare those approaches.

    If the underlying problem may be surface shape rather than collection alone, our grading and yard leveling guide is a helpful next step.

    Related guide: If you are not sure whether the yard has a drainage problem in the first place, the Signs You Need Better Yard Drainage Guide can help identify common warning signs.

    Cost guide: The What Affects Drainage Project Cost Guide helps explain why some water issues require much more than a simple quick fix.

    Quote guide: The drainage quote guide makes it easier to compare problem definition, outlet planning, and restoration scope across proposals.

    Expectations guide: The drainage expectations guide helps homeowners understand trenching, pipe work, restoration, and how the yard may look mid-project.

    Maintenance guide: The drainage maintenance guide helps homeowners monitor outlets, runoff patterns, and recurring wet spots over time.

    Mistakes guide: The drainage planning mistakes guide helps homeowners catch runoff-source and grading mistakes before trenching begins.

    Warning signs guide: The drainage warning signs guide helps homeowners judge pooling, outlet trouble, and runoff changes before the problem grows.

    More Service Planning Guides


  • Patio Installation Guide for Homeowners

    Patio Installation Guide for Homeowners

    A patio project can add usable square footage, improve circulation through the yard, and make outdoor living areas feel more intentional. It can also become expensive or frustrating if homeowners jump straight to surface materials without thinking through layout, drainage, elevation, and daily use. A good patio is not just a finished surface. It is a well-planned part of the landscape.

    This guide explains what patio installation usually includes, how to think about material and layout choices, and what homeowners should ask before hiring. Whether you are considering concrete, pavers, or natural stone, the same planning logic applies: function comes first, then finish.

    What patio installation usually includes

    Patio work typically begins with layout planning, excavation, sub-base preparation, grade control, and edge definition before the visible surface material is ever installed. Depending on the project, the scope may also include steps, seat walls, drainage improvements, lighting rough-ins, or connections to nearby walkways and planting beds.

    Patio Installation Guide for Homeowners related example showing Concrete, paver, and stone outdoor surfaces showing common patio and walkway material choices for homeowners
    This patio example gives homeowners a visual reference for comparing layout, materials, and maintenance tradeoffs before starting the project.
    • Common patio materials: poured concrete, pavers, natural stone, and concrete slabs.
    • Common add-ons: seating walls, fire pit zones, pathways, landscape lighting, pergola pads, and planting-bed integration.
    • Main performance factors: base preparation, drainage, slope, edge restraint, and the right surface for the way the space will be used.

    Start with how the patio will be used

    Before comparing materials, homeowners should define what the space needs to do. A patio for a small dining set has different size and circulation needs than one designed for entertaining, grilling, and a fire feature. If people will move between the house, lawn, pool, or outdoor kitchen, those routes should shape the layout from the beginning.

    This is one reason broader planning matters. Our landscaping services guide explains how patios often work best when they are planned alongside walkways, lighting, drainage, and planting instead of as a standalone slab.

    Material choice affects cost, appearance, and maintenance

    Material decisions often start with appearance, but long-term upkeep matters too. Concrete can be a practical value option and works well in many contemporary layouts. Pavers offer flexibility and easier spot repair. Natural stone can look premium and organic, but may raise installation complexity and cost.

    • Concrete patios: often cost less than premium stone options and can be finished in multiple ways.
    • Paver patios: offer modular flexibility, pattern variety, and easier localized repairs when installed well.
    • Natural stone patios: can create a distinctive high-end look, but require good planning around thickness, bedding, and edge details.

    The best choice depends on budget, design goals, climate, maintenance tolerance, and how the patio connects to the rest of the property.

    Drainage and slope matter more than many homeowners expect

    A patio should not trap water against the house or create slippery low spots after rain. Drainage planning is one of the most important parts of the project, especially when the patio sits near the foundation, a retaining wall, or a transition into lawn and planting beds.

    If your yard already struggles with pooling water or runoff, a patio project is often the right time to solve that. Our drainage solutions guide explains why water movement should be handled as part of the same plan, not after the finish surface is already installed.

    How the installation process usually unfolds

    While exact methods vary by material, most patio projects follow a similar sequence:

    • layout confirmation and elevation planning
    • excavation and removal of unsuitable material
    • base preparation and compaction
    • drainage and edge-detail work
    • surface installation and finishing
    • cleanup, curing or settlement checks, and handoff

    Homeowners who want a broader overview of staging, disruption, and project rhythm should also read what to expect during a landscaping project.

    Questions to ask before hiring for a patio

    • How will you handle drainage and slope on this part of the property?
    • What base preparation is included in the bid?
    • How will the patio connect to steps, doors, walkways, or nearby beds?
    • What material do you recommend for this use case, and why?
    • What maintenance should I expect in the first year and beyond?

    Our guide on questions to ask before hiring a landscaper is a helpful companion when you start comparing bids.

    What homeowners should remember

    A good patio is not only about the surface. It is about how the space functions, drains, connects to the yard, and holds up over time. The more a contractor explains layout, base work, water management, and transitions to nearby features, the more confidence you can have that the finished patio will perform well instead of simply looking good on day one.

    Patio Installation Guide for Homeowners related example showing Backyard patio comparison showing paver surface and stamped concrete surface
    This related patio detail helps show how site conditions and finish choices can change the homeowner's plan.

    If you are still deciding between different outdoor-living structures, also read our patio vs deck guide for homeowners.

    If your patio is being planned as a social gathering area, also read our fire pit installation guide for homeowners.

    Material comparison: Homeowners choosing a patio surface can also review the Paver Patio vs Stamped Concrete Patio Guide for repair and maintenance tradeoffs.

    Related guide: If the patio is only one part of a larger outdoor-living plan, the Backyard Landscaping Ideas and Planning Guide for Homeowners can help connect seating, lawn, privacy, and circulation.

    Related guide: Homeowners with older hardscape can compare symptoms in the Signs It Is Time to Replace a Patio Guide before deciding whether repairs are enough.

    Cost guide: The What Affects Patio Cost Guide breaks down why similar-looking patio proposals can be priced very differently.

    Timeline guide: Homeowners who want a clearer schedule can review the How Long Does a Patio Project Take Guide alongside installation and cost planning.

    Quote guide: The patio quote guide helps homeowners compare bids by prep, drainage, and finish scope instead of price alone.

    Expectations guide: The patio expectations guide helps homeowners understand disruption, excavation, finish-detail flow, and cleanup timing.

    Maintenance guide: The patio maintenance guide helps homeowners stay ahead of joint wear, settling, and surface changes.

    Mistakes guide: The patio planning mistakes guide helps homeowners catch layout, drainage, and sizing mistakes before installation.

    Warning signs guide: The patio warning signs guide helps homeowners judge settling, drainage trouble, and surface wear before the space worsens.

    More Service Planning Guides

    More Patio Ideas and Example Guides

    More Patio Comfort and Layout Guides

    More Patio Transition and Step Guides

    More Patio Edge and Planting Guides

    More Patio Comfort Guides

    More Patio Lighting Guides

    More Patio Edge-Definition Guides

    More Patio Edge-Use Guides

    More Patio Planting Condition Guides

    More Patio Planting and Edge-Cleanliness Guides

    More Family-Use Patio Planting Guides

    More Pet-Friendly Patio Planting Guides

    More Patio Border Finish Guides

    More Patio Exposure Guides

    More Small-Space Patio Planting Guides

    Related homeowner planning guides

    Use these next-step guides to make the project more specific before comparing estimates or choosing materials.

    Related homeowner planning guides

    Use these next-step guides to narrow the project before choosing materials, comparing estimates, or changing the layout.

    More specific homeowner planning guides

    Use these deeper guides when the broad project direction is clear and the next decision is about layout, materials, maintenance, or cost tradeoffs.

    More specific homeowner planning guides

    Use these deeper guides when the broad project direction is clear and the next decision is about layout, materials, access, maintenance, or cost tradeoffs.


  • Why Concrete Driveways Crack and How Contractors Control It

    Why Concrete Driveways Crack and How Contractors Control It

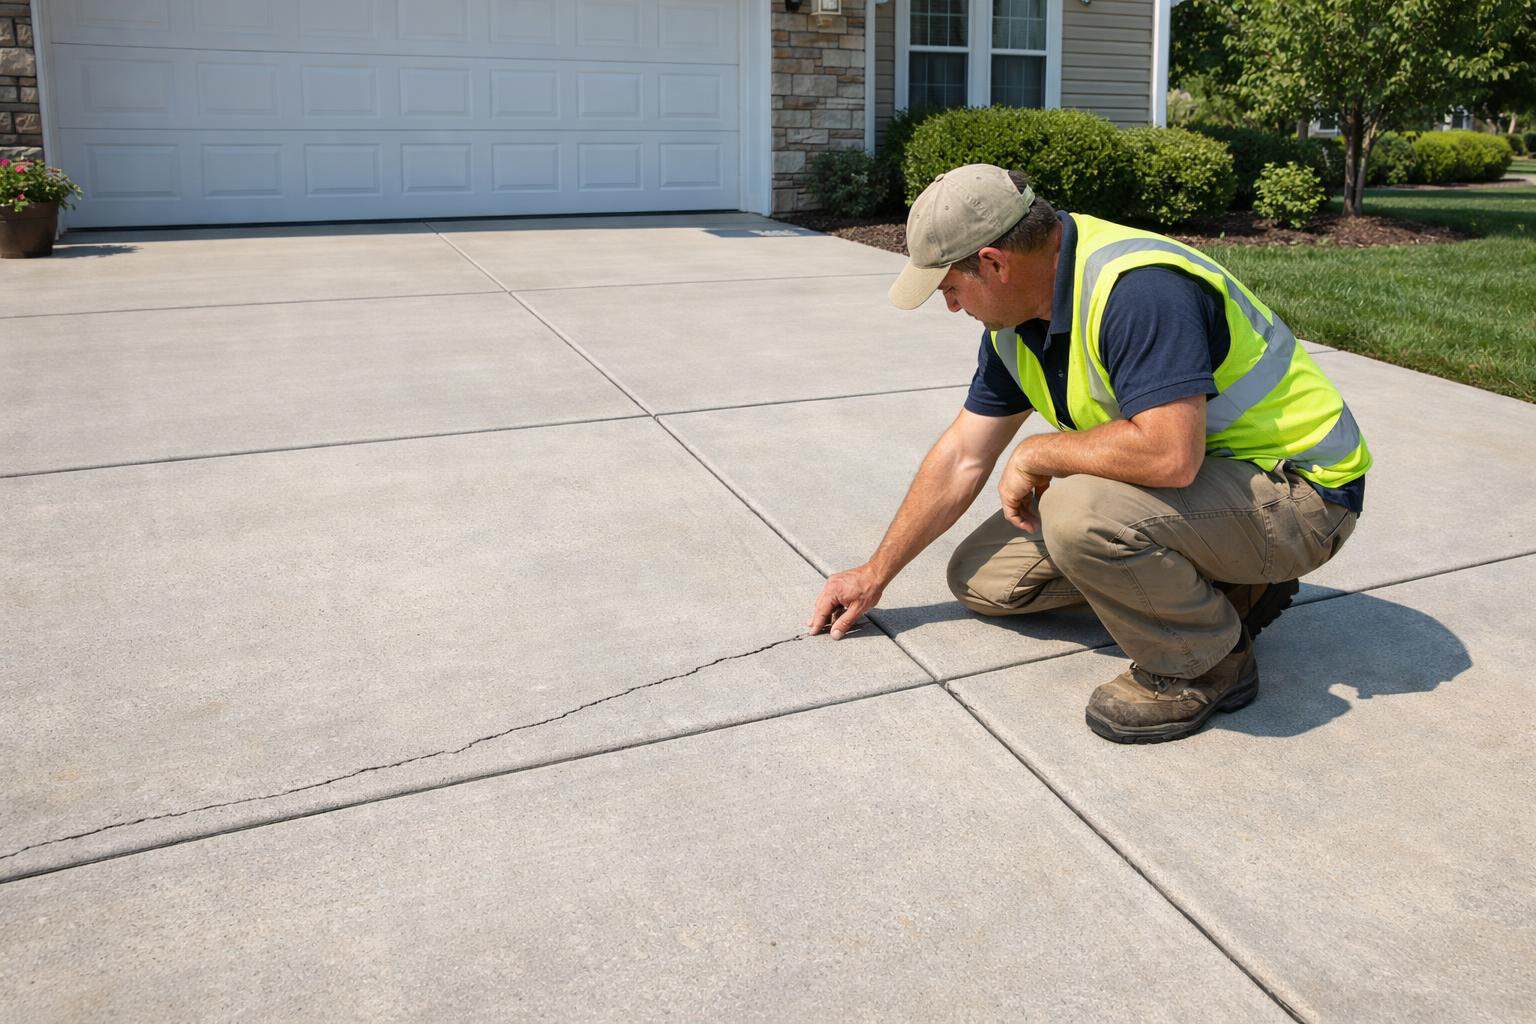
    Concrete cracking worries almost every homeowner, but cracking by itself is not proof that a driveway was installed badly. Concrete naturally shrinks as it cures, responds to temperature change, and moves slightly with the ground beneath it. The real question is not whether cracking can happen at all. The real question is whether the driveway was built to control that movement in a predictable way.

    Good contractors talk honestly about cracking because they understand the difference between expected movement and preventable damage. Homeowners should be cautious when someone promises a driveway that will never crack.

    Why concrete cracks in the first place

    • Moisture loss during curing causes shrinkage.
    • Temperature swings expand and contract the slab.
    • Soil movement can remove support beneath sections of concrete.
    • Heavy loads stress weak or thin areas.
    • Poor drainage softens the base and increases movement.

    Some of these forces are unavoidable. That is why installation quality matters so much. Contractors are not eliminating physics; they are managing it.

    Why Concrete Driveways Crack and How Contractors Control It related example showing Concrete, paver, and stone outdoor surfaces showing common patio and walkway material choices for homeowners
    This patio example gives homeowners a visual reference for comparing layout, materials, and maintenance tradeoffs before starting the project.

    How contractors control cracking

    Concrete driveway installation with joint planning and finishing methods that help contractors control cracking.
    Contractors control cracking through base prep, reinforcement decisions, joint planning, and how the slab is placed and cured.

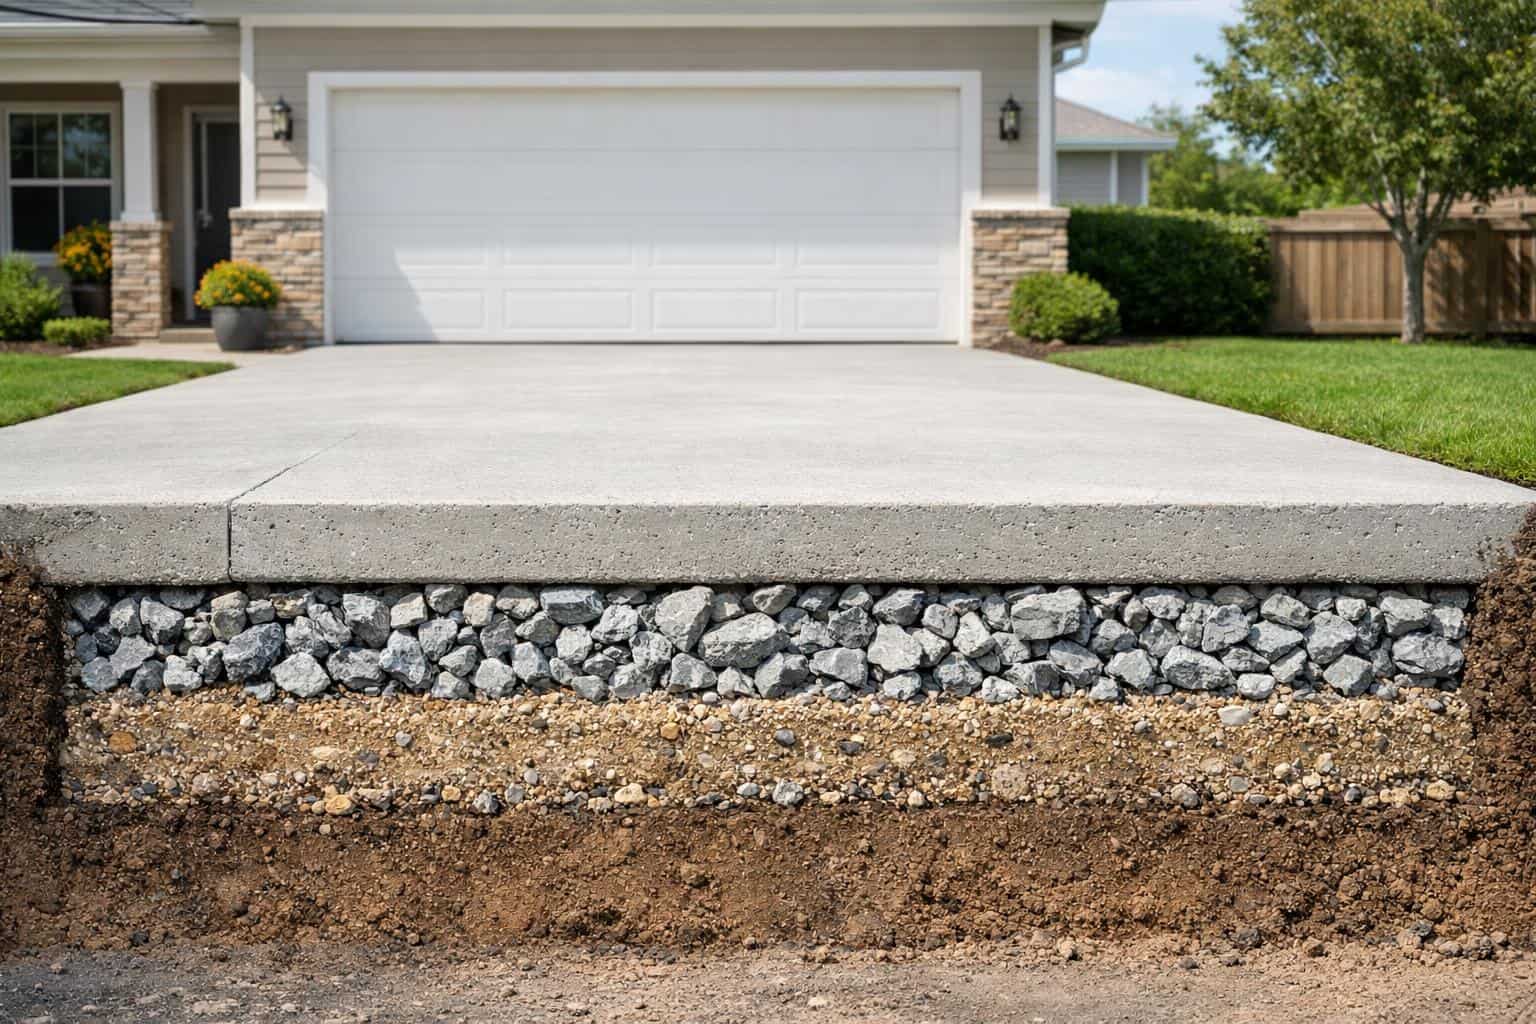
    The most important crack-control steps happen before the concrete truck shows up. A stable base, consistent thickness, proper slope, and smart joint placement all help the slab behave the way it is supposed to.

    • Compact the subgrade and base so the slab has uniform support.
    • Pour the driveway at the right thickness for the expected traffic.
    • Place control joints so shrinkage cracks form where planned.
    • Maintain drainage so water does not undermine the slab.
    • Follow sound curing practices instead of rushing the finish.

    These are the kinds of details homeowners should ask about during the bidding stage. If a contractor glosses over them, that is useful information in itself.

    What kinds of cracks are more concerning

    Fine shrinkage cracks and controlled movement at joints are very different from wide cracks, vertical displacement, or recurring cracks near settled areas. When one side of the crack is higher than the other, or the same area continues to break down, there may be a support or drainage problem under the slab.

    That is why it helps to look at crack pattern, location, and movement together instead of reacting to every visible line the same way.

    Questions homeowners should ask

    • How will you prepare and compact the base?
    • Where will control joints go and how will that layout be decided?
    • What thickness are you pouring for the vehicles that use this driveway?
    • How will runoff be directed away from the slab?
    • What cracking should be considered normal after installation?

    If you are evaluating a bid, those answers are often more important than a vague statement about workmanship. They reveal whether the contractor is planning for performance or just talking about appearance.

    Bottom line

    Concrete driveways can crack because concrete is a rigid material exposed to shrinkage, temperature change, and soil movement. What separates a durable installation from a disappointing one is how well the contractor controls those forces with preparation, thickness, joints, and drainage. For a broader look at build quality, pair this article with our guide to driveway thickness and the full installation process.

    Plan the Bigger Project

    Concrete work is often just one part of a broader exterior upgrade. If you are still mapping out the full project, also read our landscaping services guide, questions to ask before hiring a landscaper, what to expect during a landscaping project, and our landscaping costs guide for homeowners.


  • Concrete Driveway Thickness: What Homeowners Really Need

    Concrete Driveway Thickness: What Homeowners Really Need

    Concrete thickness is one of the most important structural decisions in a driveway project. It does not always get the same attention as finish, color, or price, but it has far more influence on how the slab handles vehicles and how long it stays serviceable.

    Homeowners should never assume thickness is a minor technical detail. If the driveway is poured too thin for the way it will be used, cracking, settling, and edge damage can show up much sooner than expected.

    Why thickness matters

    A driveway slab has to spread vehicle weight across the base below it. The thicker and better-supported the slab is, the better it can resist bending stress and everyday load. Thickness works together with base preparation and drainage, so it should be discussed as part of the overall structure, not as an isolated number.

    Concrete Driveway Thickness: What Homeowners Really Need related example showing Concrete, paver, and stone outdoor surfaces showing common patio and walkway material choices for homeowners
    This patio example gives homeowners a visual reference for comparing layout, materials, and maintenance tradeoffs before starting the project.
    • Thicker concrete generally handles stress better.
    • Edges are especially vulnerable when thickness is inadequate.
    • Heavy vehicles can expose a thin slab quickly.
    • Poor base preparation can make even a decent thickness perform badly.

    Residential use should drive the recommendation

    Most homeowners are not engineering a driveway from scratch, but they should still explain how the surface will be used. A driveway serving normal family vehicles may have different needs than one expected to handle heavier trucks, trailers, or repeated concentrated loads.

    That is why a trustworthy contractor asks about use patterns instead of quoting the same thickness to everyone. Matching the slab to the real traffic is part of good planning.

    Thickness is not enough without a proper base

    Homeowners sometimes hear thickness discussed as if it solves everything. It does not. Concrete still needs consistent support underneath. If the base is poorly compacted, wet, or uneven, the slab may crack or settle even when the thickness sounds acceptable on paper.

    When reviewing bids, ask not only how thick the driveway will be, but also what material will go underneath it, how the base will be compacted, and how runoff will be directed away from the slab.

    Questions homeowners should ask

    • What thickness are you recommending for this specific driveway and why?
    • How does that thickness account for heavier vehicles or edge loading?
    • What base material will support the slab?
    • How will drainage be handled so the slab keeps support over time?

    These questions help homeowners compare proposals on structural value rather than surface-level price alone.

    Concrete Driveway Thickness: What Homeowners Really Need related example showing Backyard patio comparison showing paver surface and stamped concrete surface
    This related patio detail helps show how site conditions and finish choices can change the homeowner's plan.

    Bottom line

    The right thickness is the thickness that matches how the driveway will actually be used and is supported by proper base preparation and drainage. Homeowners who want a durable slab should treat thickness as a core decision, not a fine-print detail. If you want to see how thickness fits into the broader process, read our step-by-step installation guide.

    Plan the Bigger Project

    Concrete work is often just one part of a broader exterior upgrade. If you are still mapping out the full project, also read our landscaping services guide, questions to ask before hiring a landscaper, what to expect during a landscaping project, and our landscaping costs guide for homeowners.


  • Concrete Driveway Installation Process Explained Step-by-Step

    Concrete Driveway Installation Process Explained Step-by-Step

    Most homeowners only see the day concrete gets poured, but the quality of a driveway is decided long before that. The strongest installations come from a process that starts with planning and base preparation, not from a rush to get gray concrete on the ground.

    Understanding the sequence helps homeowners compare bids and spot shortcuts. If a contractor skips over prep, drainage, or curing, that is usually more important than how polished the sales pitch sounds.

    1. Layout and planning

    The project begins with measurements, slope evaluation, access planning, and decisions about width, thickness, finish, and drainage. This is when contractors should identify any property-specific issues such as poor runoff, grade changes, root interference, or awkward garage transitions.

    Concrete Driveway Installation Process Explained Step-by-Step related example showing Front entry walkway with edging, planting beds, and material detail relevant to pathway cost planning
    This walkway example gives homeowners a visual reference for comparing layout, materials, and maintenance tradeoffs before starting the project.

    2. Demolition or excavation

    If an old driveway exists, it is removed and hauled away. For new work, the area is excavated to the required depth. The goal is to create room for both the base layer and the concrete slab, not just scrape the surface and pour on unstable ground.

    3. Base preparation

    This is one of the most important stages in the whole project. The base is shaped, leveled, and compacted so the concrete has consistent support. If the driveway will fail early, the cause is often here. Good prep also helps the contractor establish the right slope so water sheds away from the slab.

    4. Forms and thickness control

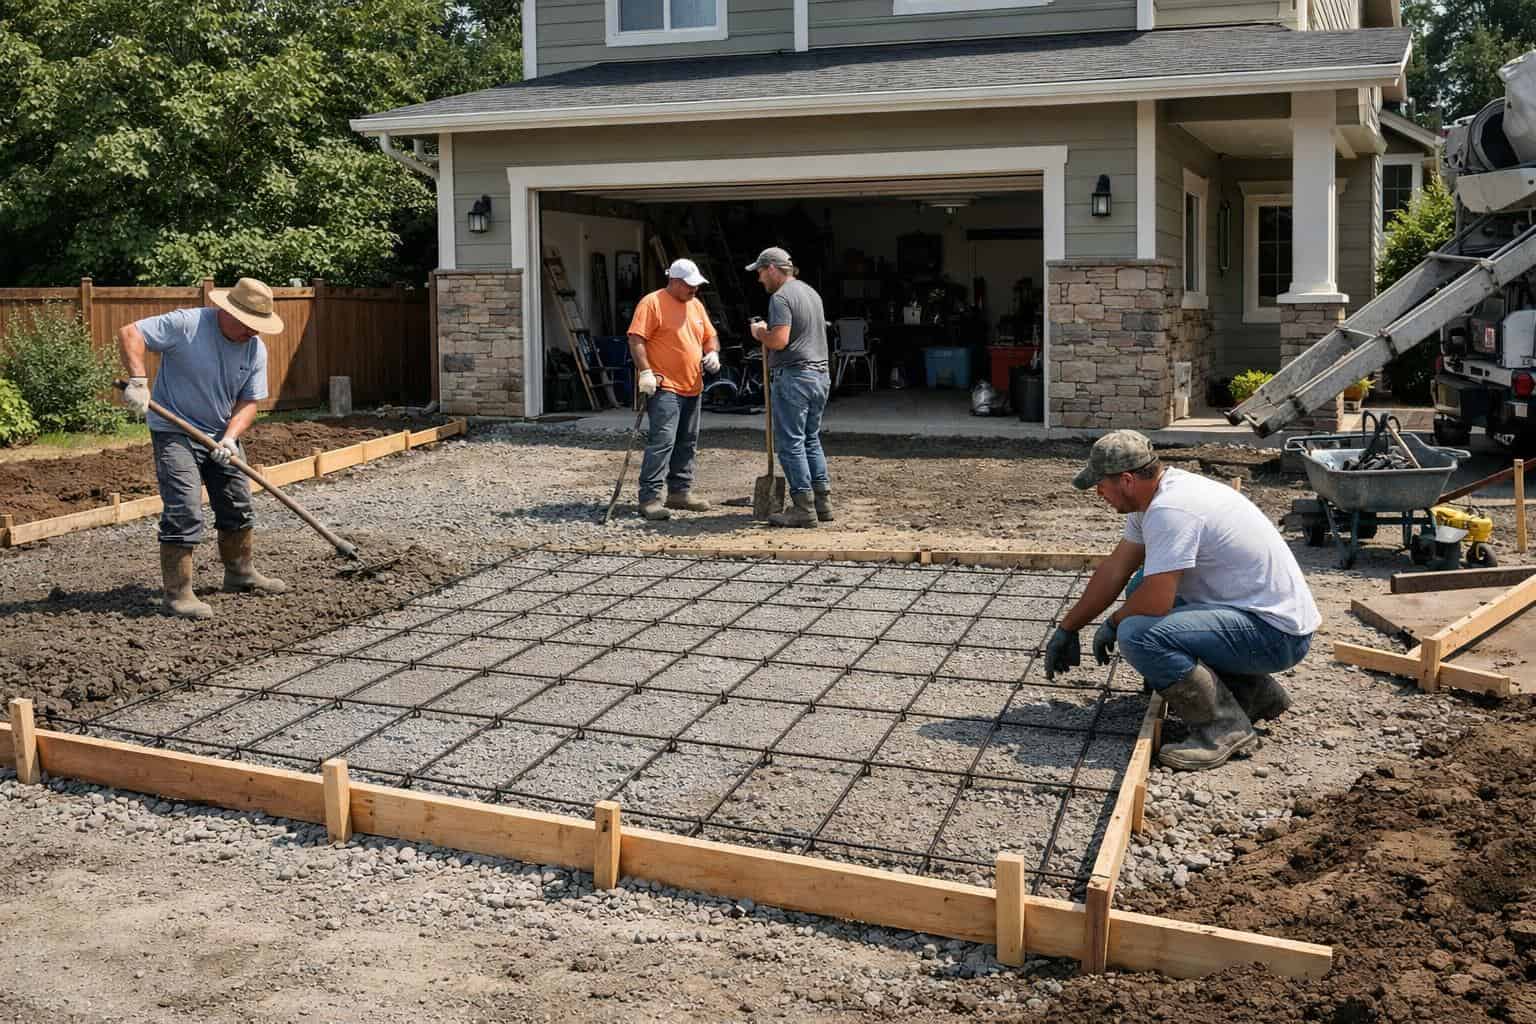
    Forms define the driveway shape and help maintain proper dimensions during the pour. Thickness decisions matter here too, especially around edges and areas that may see heavier loading. Homeowners should ask how the slab thickness was chosen for the way the driveway will actually be used.

    5. Reinforcement and joint planning

    Depending on the design, reinforcement may be used to help control movement and support the slab. Just as important, the contractor should plan control joints so shrinkage cracks form in predictable locations instead of wandering randomly across the surface.

    6. Pouring and placing the concrete

    Once the truck arrives, timing matters. The concrete must be placed, spread, and leveled efficiently so the crew can maintain consistency before finishing begins. This stage looks dramatic, but it only succeeds when the earlier prep work was handled correctly.

    7. Finishing the surface

    After screeding and floating, the contractor applies the chosen finish. On many residential driveways, that means a broom finish for traction. Decorative projects may involve other finishes or stamped patterns. The finish should match both the homeowner’s design priorities and the driveway’s functional needs.

    8. Cutting joints and protecting the slab

    Control joints are cut or formed to guide where shrinkage movement occurs. The slab then needs time to cure. This part often gets underestimated by homeowners eager to use the new surface quickly, but curing is part of the installation, not an afterthought.

    9. Final walkthrough and homeowner expectations

    Before the job is considered complete, the contractor should explain when the driveway can be walked on, driven on, cleaned, or sealed. This is also the right time to ask what cracking is considered normal and what warning signs would justify follow-up.

    What homeowners should watch for

    • Does the contractor emphasize prep and drainage, or only talk about the pour day?
    • Are thickness and joint placement explained clearly?
    • Is curing time treated seriously?
    • Are expectations for traffic and maintenance explained before the project starts?

    A quality driveway is a sequence of correct steps, not a single dramatic moment. If you are still comparing bids, pair this article with our contractor selection guide and our article on crack control.

    Concrete Driveway Installation Process Explained Step-by-Step related example showing Residential walkway and pathway installation scene with pavers, edging, and landscape bed context
    This related walkway detail helps show how site conditions and finish choices can change the homeowner's plan.

    Plan the Bigger Project

    Concrete work is often just one part of a broader exterior upgrade. If you are still mapping out the full project, also read our landscaping services guide, questions to ask before hiring a landscaper, what to expect during a landscaping project, and our landscaping costs guide for homeowners.

    If you are still deciding on surface type before the project starts, compare the tradeoffs in our concrete vs paver driveway guide.

    More Concrete Driveway Installation Process Explained Step-by-Step Guides

    More Driveway Finish and Edge Guides