Landscaping Guru

Start with the service type

Landscaping Services Guideposts

Use these guides to understand what each service includes before comparing providers or requesting quotes.

Core service explainers

Start here when you are still deciding what kind of landscaper or outdoor contractor you need.

Compare before you hire

Use these pages when two services or surface choices sound similar but lead to different scopes.

Hire smarter

Planning And Contractor Comparison

Use this hub when you are moving from ideas into estimates, bids, and contractor conversations.

Before requesting estimates

These guides help define scope and compare companies before the first site visit.

Budget with better assumptions

Cost Guides And Calculators

Use this hub to move from rough budget ranges into the details that usually change quotes.

Calculator starting points

Open the calculator hub or a cost guide when you need a quick planning range.

High-impact cost decisions

These pages help compare choices where price, lifespan, and maintenance tradeoffs matter.

Understand the build

Installation And Site-Work Pathways

Use these guides to understand sequencing, site prep, access, and the details that affect long-term performance.

Hardscape and site prep

These projects often depend on base prep, demolition, grading, drainage, and access.

Drainage and retaining work

Use these when water, grade, or slope stability is part of the project.

Choose materials with ownership in mind

Material And Finish Decision Paths

Use these guides when appearance, maintenance, replacement, and budget all affect the right material choice.

Surface and finish comparisons

Compare outdoor surfaces before committing to a driveway, patio, or lawn direction.

Landscape material planning

Use these pages when quantity, delivery, or long-term maintenance are the main concern.

Protect the investment

Maintenance And Ownership Next Steps

Use these guides to understand ongoing care, seasonal refreshes, and when maintenance points to a bigger fix.

Maintenance planning

These guides help compare recurring service, seasonal work, and refresh projects.

When upkeep becomes repair

Use these when repeated maintenance problems suggest drainage, surface, or material issues.

  • Sod vs Seed Guide for Homeowners

    Sod vs Seed Guide for Homeowners

    Sod and seed can both create a healthy lawn, but they ask different things from a homeowner. Some households want a faster finished look and are willing to invest more upfront. Others are comfortable with a longer establishment process if it helps control cost. The better choice depends on budget, timing, watering discipline, yard conditions, and how quickly the space needs to be usable.

    This is especially important on new builds or major yard renovations where irrigation, grading, and drainage may all affect lawn success.

    Why homeowners choose sod

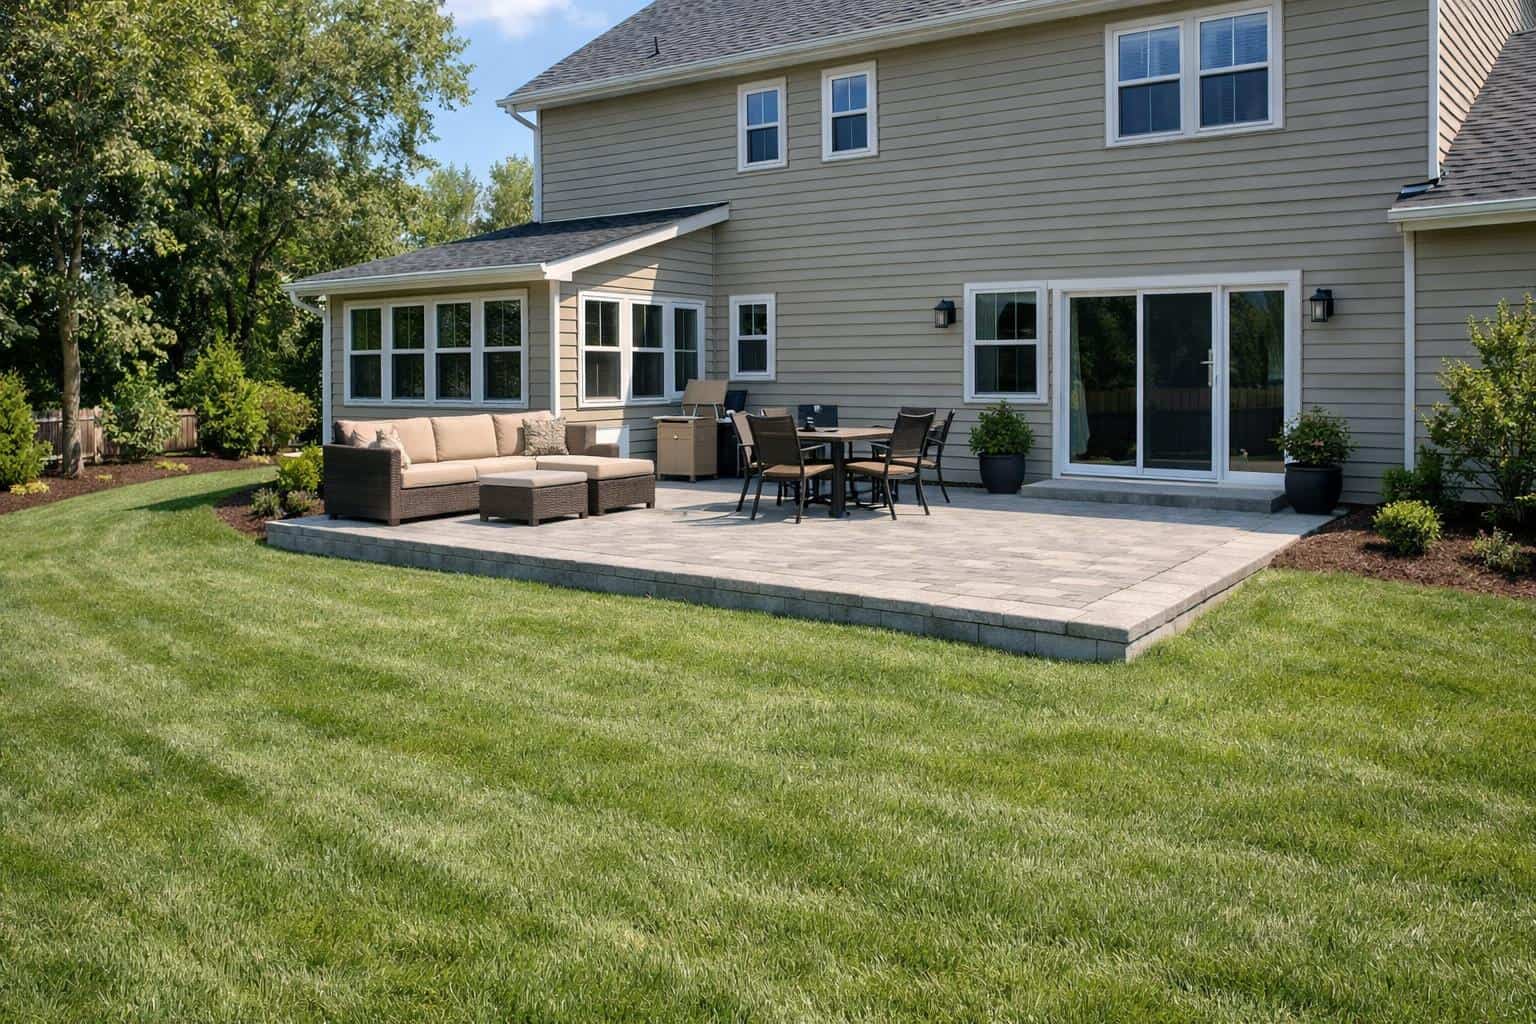
    Sod gives a lawn an immediate finished appearance, which is one of its biggest advantages. It can make a newly built or renovated yard feel complete much faster than seed. In many cases it also helps control surface soil movement while the lawn establishes, which can be useful after grading work.

    That faster visual result is why sod often pairs well with the broader sod and lawn installation guide for homeowners who want a quick transformation.

    Why some homeowners prefer seed

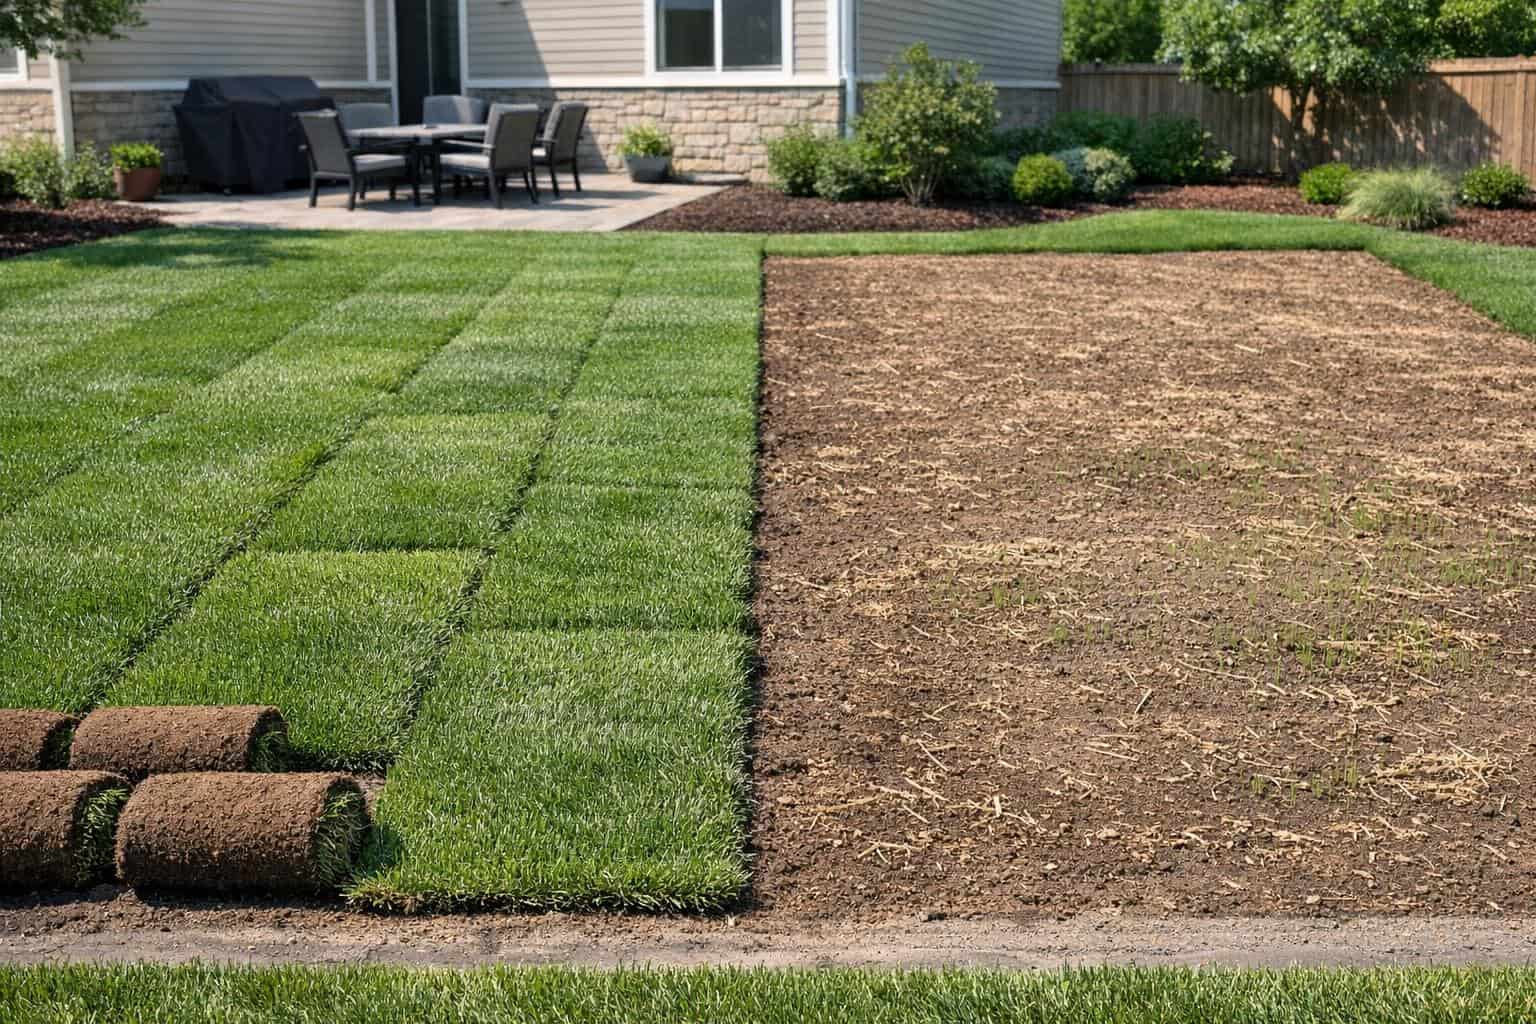
    Seed can cost less upfront and may make sense when the project area is large, the budget is tighter, or the timeline is flexible. It can also be a reasonable path when homeowners are prepared to follow watering and establishment requirements carefully. The tradeoff is that the lawn takes longer to fill in, and results can be more sensitive to weather and care during the early stages.

    Sod vs Seed Guide for Homeowners related example showing Lawn detail relevant to thinning, irrigation stress, and warning signs
    This lawn example gives homeowners a visual reference for comparing layout, materials, and maintenance tradeoffs before starting the project.

    Watering and establishment differences

    Both sod and seed need attentive watering early on, but the pattern and risk are different. Sod needs moisture to root in successfully, while seed needs the surface conditions to stay supportive long enough for germination and young growth. In either case, poor irrigation planning can undercut the result. That is why lawn-installation decisions often connect directly to the irrigation system guide.

    Durability, timing, and use

    If the yard needs to look finished sooner or handle activity earlier, sod is often the stronger fit. Seed usually requires more patience before the lawn looks complete and more caution before heavy use. Timing within the season also matters, since weather can help or hurt establishment.

    Cost tradeoffs

    Sod usually costs more upfront because homeowners are paying for a ready-grown product plus installation. Seed may lower initial cost, but it can demand more time, follow-up attention, and sometimes patching if establishment is uneven. The most useful cost comparison is not just material price, but the level of risk and time each path carries in your yard.

    Sod vs Seed Guide for Homeowners related example showing Lawn detail relevant to planning mistakes, prep, and irrigation decisions
    This related lawn detail helps show how site conditions and finish choices can change the homeowner's plan.

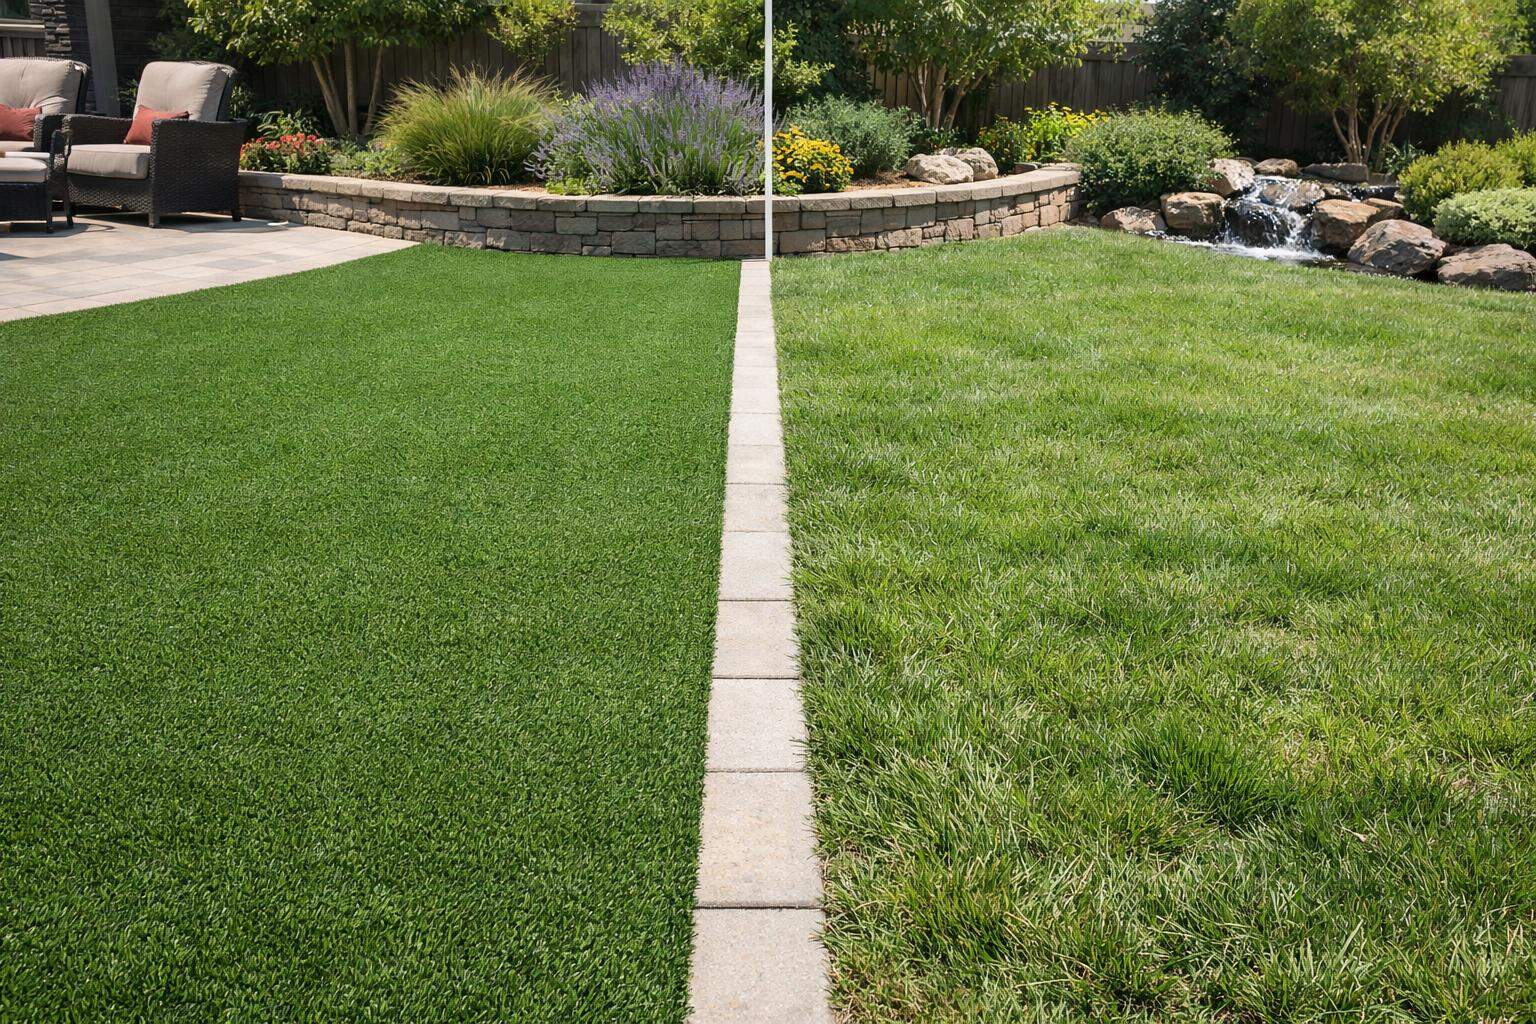
    Homeowners should also compare this decision with the broader artificial turf vs natural grass guide if they are still deciding whether a natural lawn is the right long-term direction in the first place.

    More Comparison and Decision Guides

    Compare sod, seed, and hydroseed ranges

    Use this calculator to compare rough lawn establishment ranges for the same area before choosing between faster results, lower upfront cost, and watering requirements.

    Sod vs Seed Cost Calculator

    Compare rough installed cost ranges for sod, seed, and hydroseed on the same lawn area.


  • Mulch vs Rock Landscaping Guide for Homeowners

    Mulch vs Rock Landscaping Guide for Homeowners

    Mulch and rock can both finish landscape beds cleanly, but they do not behave the same over time. Homeowners often compare them as if the decision is purely visual, yet the better choice also depends on climate, maintenance tolerance, plant type, weed pressure, and how the bed connects to the rest of the yard.

    In many landscapes, the right answer is not one material everywhere. Some yards benefit from mulch around planting-heavy areas and rock in sections where a more durable, lower-disturbance finish makes sense.

    Why mulch works well in many planting beds

    Mulched planting bed around a home with shrubs and flowers showing organic coverage and finished edges.
    Mulch often works well where plant health, soil improvement, and a softer garden look matter most.

    Mulch is often favored because it looks natural, helps moderate soil temperature, and works well around many shrubs, perennials, and young plantings. It can also make a bed feel softer and more connected to the garden, especially when the design leans toward a planted, layered look.

    Mulch does need refreshing over time, which is part of the long-term maintenance picture. For homeowners building new beds, the planting installation guide helps frame where mulch often fits best.

    Why rock appeals to some homeowners

    Rock can offer a cleaner, more permanent-looking finish and may suit modern or low-water landscape styles. It usually does not break down the way mulch does, so some homeowners see it as a lower-renewal option. In dry-climate or architectural landscapes, that can be a strong aesthetic and practical match.

    The tradeoff is that rock can hold heat, shift over time, and still require weed management. It is not automatically maintenance-free just because it lasts longer as a material.

    Weeds, cleanup, and upkeep

    Both mulch and rock can have weed issues if the bed is not prepared well. Mulch may need periodic topping up and cleanup, while rock can collect debris and become harder to tidy once leaves and organic matter settle into it. What feels like “less work” depends a lot on the yard and the owner’s expectations.

    Homeowners focused on simpler upkeep should also compare the broader low-maintenance landscaping approach, because plant selection and irrigation often affect labor just as much as ground cover choice.

    Heat, plant health, and appearance

    Mulch usually supports a softer planted look and can be friendlier around certain root zones. Rock can visually sharpen a bed and may fit drought-tolerant schemes, but in hotter climates it can intensify reflected heat around some plants. That is why material should be chosen with plant palette and exposure in mind, not just color preference.

    Cost and long-term value

    Decorative rock and mulch materials compared in a residential landscape based on appearance and replacement needs.
    Mulch and rock have different long-term value once replacement cycles, cleanup, and plant performance are considered.

    Mulch may cost less upfront in some projects, while rock can cost more to supply and install depending on the material and depth. Over time, the cost picture shifts because mulch often needs replenishment and rock may need periodic cleanup or resetting. The best comparison is how each material performs in the exact part of the yard where you plan to use it.

    Homeowners who think about appearance, heat, maintenance, and plant health together usually make a better long-term choice than those who pick ground cover on looks alone.

    Buying guide: Homeowners trying to source bed and ground-cover products can use the Where to Buy Landscaping Materials Guide before pricing local suppliers.

    Lifespan guide: The ground-cover lifespan guide helps homeowners connect material choice to refresh timing and long-term upkeep.

    More Comparison and Decision Guides


  • Fire Pit Gas vs Wood Guide for Homeowners

    Fire Pit Gas vs Wood Guide for Homeowners

    Gas and wood fire pits can both create a strong backyard focal point, but they deliver very different day-to-day experiences. Some homeowners want instant ambiance with clean ignition and simple shutdown. Others care more about the sound, smell, and ritual of a real wood fire. The right choice depends on how the space will be used, how much maintenance you want, and how the fire feature fits into the larger yard plan.

    This is one of the best decisions to make before final design starts. Once the patio, seating layout, and utility path are planned around one type of fire feature, switching later can become more expensive and less convenient.

    Why homeowners choose gas fire pits

    Gas fire pits are popular because they are easy to use. Many can be turned on quickly, deliver steady flame with less smoke, and shut off with minimal cleanup. That convenience makes them attractive for homeowners who want to use the feature often, especially on patios close to the house or in entertaining spaces where people want a clean, predictable setup.

    Gas units often pair naturally with more polished outdoor-living builds. If the fire area is being planned alongside an outdoor kitchen or upgraded lighting, gas may fit the same low-friction design direction.

    Why homeowners choose wood fire pits

    Wood fire pits appeal to homeowners who want the traditional feel of a live fire. The smell, crackle, and stronger campfire atmosphere can be hard to replicate. In the right backyard, that experience can feel more casual, social, and memorable than a gas feature.

    The tradeoff is that wood typically means more smoke, more cleanup, more storage, and more attention during and after use. That is not necessarily a drawback for every household, but it should be an intentional choice rather than a surprise after installation.

    Convenience, cleanup, and maintenance

    Gas usually wins on convenience. There is no wood stack to maintain, no ash to remove, and less mess around the seating area. Wood requires more routine cleanup and may affect nearby cushions, surfaces, or planting if smoke exposure is frequent. For homeowners who want easier upkeep across the whole yard, the low-maintenance landscaping guide aligns more naturally with gas-style convenience.

    Fire Pit Gas vs Wood Guide for Homeowners related example showing Landscape beds and groundcover materials relevant to homeowner quantity planning for mulch, soil, and decorative rock
    This materials example gives homeowners a visual reference for comparing layout, materials, and maintenance tradeoffs before starting the project.

    Cost considerations

    The right cost comparison is not just the unit itself. Gas may require utility work, trenching, and coordination with licensed trades. Wood may avoid that infrastructure, but it can still involve material, construction, and ongoing fuel handling. If the fire pit is part of a larger project, it helps to compare complete scope in the broader landscaping costs guide.

    Safety and backyard fit

    Both options need smart placement, proper clearances, and good materials around the feature. Gas can feel easier to manage in tighter entertaining spaces. Wood may need more attention to smoke direction, nearby structures, and surface protection. Homeowners should also think about whether the surrounding patio, seating, and planting plan support the way the feature will actually be used.

    Fire Pit Gas vs Wood Guide for Homeowners related example showing Landscape beds and groundcover materials relevant to homeowner quantity planning for mulch, soil, and decorative rock
    This related materials detail helps show how site conditions and finish choices can change the homeowner's plan.

    For the full project-side view, the fire pit installation guide covers design and construction expectations in more detail.

    More Comparison and Decision Guides


  • Retaining Wall Block vs Poured Concrete Guide for Homeowners

    Retaining Wall Block vs Poured Concrete Guide for Homeowners

    Retaining wall block and poured concrete can both work well in residential landscapes, but they are not interchangeable in every situation. Homeowners often compare them based on appearance alone, yet the better choice also depends on drainage, wall height, site conditions, engineering requirements, and the look they want the yard to have over time.

    Understanding the difference between these systems early can make estimate comparisons much easier. One contractor may recommend segmental wall block because it fits the site, drains well, and offers a textured finished look. Another may recommend poured concrete for a cleaner modern style or for structural reasons. The right answer depends on the project, not just the material category.

    How segmental retaining wall block works

    Segmental retaining wall block used in a residential yard with structured grade change and landscaping.
    Segmental wall block often gives homeowners more flexibility in appearance, layout, and phased installation.

    Segmental retaining walls are built from interlocking or stacked concrete blocks installed over a prepared base with drainage considerations behind the wall. They are common in residential work because they come in many sizes and finishes, can look natural or contemporary, and often integrate well with planting and patio design. The modular system can make curves, steps, and terraced layouts easier to achieve.

    Block systems still require proper excavation, base prep, drainage stone, and the right construction method. Homeowners should not assume they are simple just because they are modular. The broader retaining wall guide explains the installation basics and when a wall may need engineering or permits.

    How poured concrete retaining walls differ

    Poured concrete walls usually create a smoother, more monolithic appearance. They are often chosen for modern aesthetics or for projects where the design calls for crisp lines and a continuous structural form. Depending on the wall, reinforcement and formwork may be part of the build, which can increase complexity and labor.

    Poured concrete can perform very well, but drainage and waterproofing detail still matter. A strong-looking wall can still fail if water pressure is allowed to build behind it. That is why retaining wall decisions often overlap with the drainage planning process.

    Appearance and design flexibility

    Segmental block tends to offer more visual texture and more finish options right out of the box. It can work in rustic, traditional, and many contemporary yards depending on the block style. It is also well suited to tiered gardens, curved beds, and blended planting zones.

    Poured concrete generally creates a cleaner and more minimal look. In the right design, that can feel architectural and upscale. But some homeowners find it too stark unless it is softened by planting, lighting, or surrounding hardscape. If appearance is the main driver, ask contractors to show examples of completed walls in yards similar to yours.

    Drainage and site performance

    Residential retaining wall installation with drainage planning and structured slope support behind the wall.
    Drainage planning matters just as much as wall material when the goal is long-term retaining wall performance.

    Drainage is one of the biggest practical differences homeowners should discuss. Segmental systems are often designed with drainage stone and can be more forgiving visually if small movement occurs over time. Poured concrete walls can be very durable, but poor drainage detailing behind the wall can create serious pressure issues.

    Retaining Wall Block vs Poured Concrete Guide for Homeowners related example showing Retaining wall detail relevant to planning mistakes, drainage, and grade behavior
    This retaining wall example gives homeowners a visual reference for comparing layout, materials, and maintenance tradeoffs before starting the project.

    If runoff or slope water is already a concern, it is worth reviewing the erosion control guide and the drainage vs regrading comparison before choosing a wall system in isolation.

    Cost and construction complexity

    Costs vary by wall height, access, drainage demands, engineering, finish choice, and labor conditions. Some block walls are very cost-effective for residential sites. Some poured concrete walls become expensive because of forming, reinforcement, and finish detail. Conversely, a highly detailed block wall with curves and terraces can also become a major project.

    The key is comparing complete scope, not just wall material. Ask whether the estimate includes excavation, export, drainage stone, backfill, engineering, geogrid if needed, permits, and final grading. That will give you a more useful comparison than material pricing alone.

    Which choice fits which kind of project

    Segmental block often makes sense for decorative-yet-functional garden walls, terracing, and residential slopes where homeowners want texture and design flexibility. Poured concrete may make more sense where the desired look is very clean and modern or where the design and engineering call for that system specifically. Neither choice is automatically better in every yard.

    • Choose block when you want texture, modular flexibility, and a system commonly used in residential garden and slope projects.
    • Choose poured concrete when the design requires a cleaner monolithic appearance or when a structural approach points in that direction.
    • In either case, make drainage, base preparation, and overall site design part of the conversation from the beginning.

    For most homeowners, the best decision comes from looking at the whole site: water, grade, wall purpose, and the surrounding yard design. A retaining wall should solve a problem and still feel like it belongs in the landscape.

    More Comparison and Decision Guides

    Estimate retaining wall cost by wall assumptions

    Use this calculator to test wall face area, material type, drainage complexity, and access before comparing block, concrete, and engineered wall scopes.

    Retaining Wall Cost Calculator

    Estimate retaining wall pricing with wall size, material type, drainage, and access assumptions.


  • Privacy Landscaping Guide for Homeowners

    Privacy Landscaping Guide for Homeowners

    Privacy landscaping helps homeowners create separation without making the yard feel closed off or harsh. Instead of relying only on a fence or wall, privacy planting uses hedges, small trees, shrubs, grasses, and layered beds to block views, soften boundaries, and make outdoor living spaces feel more comfortable.

    The best privacy plan depends on what you are screening and how quickly you need results. Some homeowners want year-round backyard privacy from nearby windows. Others want to soften a fence line, separate a patio from a neighboring property, or create visual screening around a pool, fire pit, or outdoor dining area. Those are different goals, and they lead to different planting choices.

    How privacy landscaping usually works

    Most privacy landscapes use layering rather than one single row of plants. A solid hedge can work well in the right location, but layered planting often looks better and can be easier to maintain over time. A common approach is to combine taller anchor plants with medium shrubs, ornamental grasses, and lower planting that finishes the bed. This creates more depth and helps the screen look intentional from inside the yard.

    If the privacy area is part of a larger outdoor-living zone, it should be planned together with hardscape and seating. Homeowners creating a patio, fire feature, or dining space may also want to review the outdoor kitchen guide or fire pit guide so the privacy planting supports how the space will actually be used.

    Choosing the right type of screen

    Evergreen hedges are popular because they offer year-round coverage and a clean look, but they are not the only solution. Small trees can raise the screening higher where neighbor sightlines come from upper windows. Ornamental grasses can soften views in a modern landscape. Mixed shrub borders can create privacy while still looking natural and varied.

    The right choice depends on mature size, maintenance needs, sun exposure, irrigation access, and how much room the bed has to grow. A plant that looks tidy at installation can become a constant pruning chore if spacing is too tight or the variety is wrong for the site.

    Spacing, growth, and maintenance

    One of the biggest mistakes in privacy landscaping is planning only for day one. Plants are often installed closer together than their mature size allows because the homeowner wants instant coverage. That can create crowding, poor airflow, disease pressure, and expensive maintenance later. It is usually smarter to design for healthy mature growth and accept that privacy builds over time.

    Irrigation also matters. New privacy plantings often need regular establishment watering, and ongoing water needs depend on climate and plant type. If the bed will be irrigated automatically, the irrigation system guide can help clarify what should be planned before planting begins.

    Blending privacy with overall yard design

    Privacy planting should not feel like an isolated wall of green unless that is the explicit style goal. The most successful screens are integrated into the rest of the yard through edging, lighting, mulch, and surrounding bed design. Lighting can make privacy planting useful at night while also adding security and atmosphere. If that matters for the space, the landscape lighting guide is worth reviewing alongside the planting plan.

    Privacy beds also benefit from a clear maintenance strategy. Homeowners who want lower upkeep may prefer broader, simpler masses of durable plants. Those who want a more layered and refined look should expect more pruning, cleanup, and seasonal attention. The low-maintenance landscaping guide can help set realistic expectations.

    What privacy landscaping may cost

    Privacy landscaping costs depend on plant size, quantity, soil preparation, irrigation, access, and whether any hardscape or grading is included. Larger material may provide more immediate screening, but it usually costs substantially more to buy, transport, and install. A mixed border can also cost more than a single-species hedge because it uses more plant types and design labor.

    Privacy Landscaping Guide for Homeowners related example showing Layered privacy landscaping with screening plants, mulch beds, and fence-line layout detail
    This privacy example gives homeowners a visual reference for comparing layout, materials, and maintenance tradeoffs before starting the project.

    When comparing quotes, ask how the contractor is balancing mature size, installation spacing, irrigation, and maintenance. A cheaper initial layout may not stay attractive or practical over time.

    Questions to ask before moving forward

    • What view or exposure is this planting intended to block?
    • How large will these plants get at maturity, and how much pruning will they need?
    • Will this screen provide privacy year-round or only seasonally?
    • What irrigation plan supports establishment and long-term health?
    • How does this privacy bed fit into the rest of the yard design?

    Privacy landscaping is at its best when it solves a practical need and improves the feel of the yard at the same time. Homeowners who plan for growth, maintenance, and overall layout usually get a softer, more useful result than those who rush into a single quick screen.

    Privacy Landscaping Guide for Homeowners related example showing Residential privacy landscaping scene with layered screening plants, planting beds, and fence line context
    This related privacy detail helps show how site conditions and finish choices can change the homeowner's plan.

    Related guide: If privacy planting is no longer screening well or is making the yard harder to use, the Signs Privacy Landscaping Needs an Upgrade Guide can help clarify whether trimming is enough.

    Cost guide: If you are budgeting for screening, the Privacy Landscaping Cost Guide breaks down the biggest price drivers.

    Quote guide: The privacy landscaping quote guide helps homeowners compare screening strategy, plant size, irrigation support, and bed-finish scope.

    Timeline guide: The privacy landscaping timeline guide helps homeowners compare sourcing, bed prep, installation, and finish timing.

    Expectations guide: The privacy landscaping expectations guide helps homeowners understand plant staging, bed prep, irrigation changes, and finish timing.

    Mistakes guide: The privacy landscaping planning mistakes guide helps homeowners catch screening, spacing, and irrigation mistakes before planting begins.

    Maintenance guide: The privacy landscaping maintenance guide helps homeowners manage watering, pruning, and long-term screen density.

    Warning signs guide: The privacy landscaping attention signs guide helps homeowners judge thinning, weak density, and irrigation-related stress before the screen declines further.

    More Service Planning Guides

    More Privacy Ideas and Example Guides

    More Backyard Privacy Planning Guides

    More Evergreen Privacy Guides

    More Privacy Use-Case Guides

    More Pool and Screen-Type Guides

    More Patio and Hedge-Form Guides

    More Side-Yard and Spacing Guides

    More Neighbor-Line and Maintenance Guides

    More Corner Lot and Establishment Guides

    More Patio-Adjacent Privacy Guides

    More Driveway-Side and Installation Guides

    More Utility-Zone and Root-Care Guides

    More Elevated-View and Soil-Care Guides

    More Specialty Privacy Use-Case Guides

    More Raised-Deck and Screen-Reset Guides

    Related homeowner planning guides

    Use these next-step guides to make the project more specific before comparing estimates or choosing materials.

    Related homeowner planning guides

    Use these next-step guides to narrow the project before choosing materials, comparing estimates, or changing the layout.

    More specific homeowner planning guides

    Use these deeper guides when the broad project direction is clear and the next decision is about layout, materials, maintenance, or cost tradeoffs.

    More specific homeowner planning guides

    Use these deeper guides when the broad project direction is clear and the next decision is about layout, materials, access, maintenance, or cost tradeoffs.


  • Erosion Control Guide for Homeowners

    Erosion Control Guide for Homeowners

    Erosion is more than a cosmetic landscaping issue. When soil washes away, homeowners can lose planting beds, expose roots, undermine hardscape, create muddy runoff, and place stress on slopes or structures. In some yards, erosion appears slowly as thinning soil and exposed areas. In others, it shows up quickly after storms as rills, channels, washed mulch, or sediment collecting where it should not.

    The right fix depends on why the soil is moving in the first place. Water concentration, steep grade changes, poor vegetation cover, gutter discharge, bare soil, compacted surfaces, and neighboring runoff patterns can all contribute. That is why erosion control should be treated as a site problem first and a planting problem second.

    Signs a yard may need erosion control

    Homeowners often notice erosion after heavy rain, but the warning signs can appear well before that. Bare patches on a slope, exposed roots, washed-out mulch, sediment on walkways, low spots forming near runoff paths, and areas where water consistently carves channels through the soil are all common signals. If a retaining wall, fence, or patio edge is starting to look undermined, the issue may be more serious than surface damage.

    Erosion Control Guide for Homeowners related example showing Landscape beds and groundcover materials relevant to homeowner quantity planning for mulch, soil, and decorative rock
    This materials example gives homeowners a visual reference for comparing layout, materials, and maintenance tradeoffs before starting the project.

    When runoff is the main driver, the best starting point is often the broader drainage guide. If the yard has grade problems, the grading and yard leveling guide can help clarify whether reshaping the site should happen before adding stabilization materials.

    Common residential erosion causes

    In residential landscapes, erosion usually comes from concentrated water flow rather than one dramatic event. Downspouts may release too much water in one area. A patio or driveway may shed water toward a bed or slope. Soil may be left exposed after a project, with no planting or protective cover. In some cases, irrigation overspray contributes to surface loss over time. Steeper slopes and sparse root systems make these conditions worse.

    Yards with repeated runoff often need a combination of solutions, not a single fix. For example, a homeowner may need better drainage collection, regrading, denser planting, and mulch or rock coverage together. Treating only the visible damage without redirecting the water usually leads to repeat failure.

    Common erosion-control solutions

    Solutions vary based on slope, soil type, drainage pattern, and severity. Planting deep-rooted ground cover can help hold soil in place. Mulch blankets or erosion-control matting may stabilize exposed surfaces while vegetation establishes. In tougher areas, contractors may use rock swales, channel lining, edging, small retaining structures, or grade reshaping to slow and redirect runoff.

    Hardscape solutions are not always the first choice, but they can be necessary when the slope is steeper or when soil movement threatens surrounding structures. If wall construction is part of the plan, the retaining wall guide and the retaining wall material comparison can help frame the conversation.

    How planting supports erosion control

    Planting helps most when it is part of a broader stabilization strategy. Dense root systems protect the surface, reduce splash erosion, and improve soil structure over time. But planting alone may fail if water is still moving too fast across the site. Matching plant choice to exposure, moisture, and slope conditions is essential.

    For homeowners who want a softer-looking fix, combining stabilization with a planting installation plan can make the final result look intentional rather than purely functional.

    How much erosion-control work may cost

    Costs depend heavily on site access, slope severity, drainage corrections, and how much material is needed to stabilize the area. A simple planting-and-mulch fix is very different from a project that includes trench drainage, grade changes, rock work, or structural support. As with most yard work, the labor behind the fix often matters as much as the visible materials.

    Erosion Control Guide for Homeowners related example showing Landscape beds and groundcover materials relevant to homeowner quantity planning for mulch, soil, and decorative rock
    This related materials detail helps show how site conditions and finish choices can change the homeowner's plan.

    When comparing estimates, ask contractors which part of the work addresses the cause, which part protects the surface, and how long the stabilization may take to fully establish. That is especially important when vegetation is part of the solution.

    Questions to ask a contractor

    • What is causing the erosion on this site, and how are you addressing that cause directly?
    • Will the solution rely on planting, hardscape, drainage work, or a combination?
    • How will runoff behave differently after this work is complete?
    • What maintenance should be expected while the area establishes?
    • Are there sections of the yard that need grading before surface stabilization begins?

    Erosion control works best when it is treated as part of the whole landscape system. Homeowners who solve runoff, grade, and stabilization together usually get a cleaner-looking yard and a more durable result.

    Materials guide: Homeowners working on grade-sensitive sites can also use the sloped-yard materials guide before choosing surfaces and ground cover.

    Quote guide: The erosion control quote guide helps homeowners compare runoff diagnosis, stabilization methods, drainage measures, and slope-treatment scope.

    Timeline guide: The erosion control timeline guide helps homeowners compare diagnosis, stabilization work, planting, and follow-up expectations.

    Expectations guide: The erosion control expectations guide helps homeowners understand early site disruption, stabilization steps, and follow-up timing.

    Mistakes guide: The erosion control planning mistakes guide helps homeowners catch runoff-diagnosis and stabilization-strategy mistakes before work begins.

    Maintenance guide: The erosion control maintenance guide helps homeowners monitor runoff, slope condition, and stabilization performance over time.

    Warning signs guide: The erosion control warning signs guide helps homeowners judge renewed runoff, exposed soil, and slope movement before the problem worsens.

    More Service Planning Guides


  • Outdoor Kitchen Guide for Homeowners

    Outdoor Kitchen Guide for Homeowners

    An outdoor kitchen can turn a patio or backyard into a true living space, but it also adds more planning complexity than a basic seating area or fire feature. Homeowners usually need to think through layout, cooking style, countertop space, utility connections, weather exposure, drainage, lighting, and how the new kitchen relates to the rest of the yard.

    The most successful projects start with function, not just appearance. Before choosing appliances or finishes, it helps to decide how the space will actually be used. Some households want a simple built-in grill and prep counter. Others want a larger entertaining zone with refrigeration, storage, bar seating, shade, and room for serving. The scope drives the budget, timeline, and contractor team you may need.

    What an outdoor kitchen project usually includes

    Outdoor kitchens vary widely, but most projects are built from a few core components: a cooking appliance, work surface, durable base structure, and surrounding patio or gathering area. More advanced builds may also include electrical service, gas lines, sink plumbing, task lighting, refrigeration, or overhead cover.

    In many yards, the kitchen itself is only part of the work. Contractors may also need to extend a patio, improve grading, adjust drainage, add retaining walls, or strengthen the surface under the finished structure. That is why it helps to review the broader landscaping project process before construction starts.

    How to choose the right layout

    Layout affects both convenience and cost. A straight run with a grill and prep space is often the simplest and most budget-friendly option. L-shaped and U-shaped layouts create more working room and can support entertaining, but they require more material, more coordination, and more yard space. If the kitchen is too far from the house, utility runs can become more expensive. If it is too close to doors or tight walkways, daily use can feel cramped.

    Homeowners should also think about circulation. Guests need room to gather without blocking the cook, and the kitchen should connect naturally to dining, seating, and lighting. If you are already planning a new patio, reviewing a patio installation guide can help you coordinate both spaces as one project.

    Utilities and infrastructure matter more than finishes

    Appliances get attention, but the infrastructure behind them is often what determines whether a project feels easy or frustrating. Gas, electrical, and water requirements should be addressed early. A contractor may need to trench for service lines, coordinate licensed trades, or meet local code requirements for shutoffs and clearances. Ventilation, drainage, and weather protection also matter, especially around cabinets and appliances.

    If the site has slope or water issues, tackle them before the kitchen is built. Pooling water, unstable base conditions, or poor runoff can shorten the life of hardscape and utility components. In those cases, it is smart to compare solutions in the drainage guide or the grading and yard leveling guide.

    Best materials for outdoor kitchens

    Outdoor kitchens need materials that can handle weather, moisture, heat, and routine cleaning. Stone, concrete, masonry veneer, stainless steel, and outdoor-rated surfaces are common choices because they hold up better than many indoor materials. The right finish depends on climate, maintenance tolerance, and the style of the home.

    It is worth asking contractors why they recommend a particular material system, how it performs over time, and what routine care it needs. A beautiful design is less useful if surfaces stain easily, metal components rust, or cabinet materials break down in sun and rain.

    How much an outdoor kitchen may cost

    Outdoor kitchen costs vary sharply based on size, appliances, utility work, and surrounding hardscape. A compact grill-and-counter project is very different from a full entertaining kitchen with refrigeration, bar seating, lighting, and overhead structure. Labor complexity often rises when electrical, gas, and plumbing are combined with masonry work.

    When comparing bids, focus on what is actually included. Some proposals price only the kitchen structure, while others include appliance installation, prep counters, utility rough-ins, permits, or adjacent patio work. The broader landscaping costs guide can help you understand where those cost differences come from.

    Questions to ask before hiring

    • Will this contractor handle only the hardscape, or coordinate electrical, gas, and plumbing trades too?
    • What base preparation is included beneath the kitchen and surrounding patio?
    • How are drainage and runoff handled around the finished structure?
    • Which finishes and appliances are rated for outdoor use in this climate?
    • What access, shutdowns, inspections, or permit steps should be expected?

    What to expect during the project

    Most outdoor kitchens move through site prep, utility rough-in, structure construction, surface finishing, appliance install, and final cleanup. Weather, inspections, and material lead times can all affect the schedule. Temporary disruption is normal, especially if the new kitchen connects to an existing patio, walkway, or dining zone.

    Outdoor Kitchen Guide for Homeowners related example showing Outdoor kitchen construction detail relevant to utility work, finish scope, and quote comparison for homeowners
    This outdoor kitchen example gives homeowners a visual reference for comparing layout, materials, and maintenance tradeoffs before starting the project.

    If the goal is to create a complete outdoor-living space, many homeowners also pair the kitchen with a fire pit, landscape lighting, and upgraded planting around the entertaining area. Thinking through the whole yard plan can prevent expensive rework later.

    An outdoor kitchen should make the yard easier to enjoy, not just more expensive to build. Homeowners who focus on workflow, utility planning, and durable materials tend to get better long-term value than those who design around appearance alone.

    Cost guide: If you are comparing bids, the What Affects Outdoor Kitchen Cost Guide explains why utilities, appliances, and patio integration can change the number quickly.

    Process guide: The Outdoor Kitchen Installation Guide breaks the project into the main phases homeowners usually experience on-site.

    Quote guide: The outdoor kitchen quote guide helps homeowners compare utility, appliance, and finish completeness across bids.

    Timeline guide: The outdoor kitchen timeline guide helps homeowners understand how utilities, finish level, and appliance setup affect project length.

    Maintenance guide: The outdoor kitchen maintenance guide helps homeowners protect finishes, appliances, and long-term usability.

    Mistakes guide: The outdoor kitchen planning mistakes guide helps homeowners catch layout, utility, and finish-level mismatches before construction.

    Warning signs guide: The outdoor kitchen warning signs guide helps homeowners judge wear, appliance trouble, and when the space needs more than routine upkeep.

    More Service Planning Guides

    More Outdoor Kitchen Layout Guides

    More Outdoor Kitchen Workflow Guides

    More Outdoor Kitchen Workflow Guides

    More Outdoor Kitchen Dining Guides

    More Outdoor Kitchen Counter Guides

    More Outdoor Kitchen Counter-Space Guides

    More Outdoor Kitchen Workflow Guides

    More Outdoor Kitchen Cleanup Guides

    More Outdoor Kitchen Storage Guides

    More Outdoor Kitchen Sink Guides

    More Outdoor Kitchen Cold-Storage Guides

    More Outdoor Kitchen Appliance-Zone Guides

    More Outdoor Kitchen Serving Guides

    Related homeowner planning guides

    Use these next-step guides to make the project more specific before comparing estimates or choosing materials.

    Related homeowner planning guides

    Use these next-step guides to narrow the project before choosing materials, comparing estimates, or changing the layout.

    More specific homeowner planning guides

    Use these deeper guides when the broad project direction is clear and the next decision is about layout, materials, maintenance, or cost tradeoffs.

    More specific homeowner planning guides

    Use these deeper guides when the broad project direction is clear and the next decision is about layout, materials, access, maintenance, or cost tradeoffs.

    Outdoor Kitchen Guide for Homeowners related example showing Residential outdoor kitchen with grill, counters, patio, and features that affect project cost
    This related outdoor kitchen detail helps show how site conditions and finish choices can change the homeowner's plan.

  • Artificial Turf vs Natural Grass Guide for Homeowners

    Artificial Turf vs Natural Grass Guide for Homeowners

    Homeowners comparing artificial turf and natural grass are usually trying to solve a mix of issues at once: maintenance, water use, appearance, mud, patchiness, and how much time they want to spend caring for the yard. Both options can make sense, but they come with different tradeoffs in cost, feel, drainage behavior, and long-term expectations.

    This guide breaks that decision into practical homeowner terms.

    How artificial turf and natural grass differ

    • Artificial turf: reduces mowing and day-to-day lawn care, but has a higher installation cost and a more constructed feel.
    • Natural grass: offers a classic living surface and often a lower upfront installation cost, but needs irrigation, seasonal care, and ongoing maintenance.
    • Key tradeoff: turf can reduce routine work, while natural grass offers a softer living landscape experience if you are willing to maintain it.

    Upfront cost versus long-term upkeep

    Artificial turf usually costs more to install than sod or seed, especially when the base, drainage, edging, and finish details are handled properly. Natural grass often costs less upfront but carries recurring maintenance, irrigation, fertilization, and repair costs over time.

    Artificial Turf vs Natural Grass Guide for Homeowners related example showing Lawn detail relevant to thinning, irrigation stress, and warning signs
    This lawn example gives homeowners a visual reference for comparing layout, materials, and maintenance tradeoffs before starting the project.

    If you are also weighing lawn establishment, our sod and lawn installation guide is useful alongside this page.

    Drainage, heat, and feel underfoot

    These differences matter more than many homeowners expect. Artificial turf behaves differently with heat and surface feel, and its drainage depends heavily on the base and installation quality. Natural grass changes seasonally and can become muddy or patchy when drainage or irrigation is poor. That is why this decision often connects to broader water-management planning.

    Questions to ask before choosing

    • What is the real problem I am trying to solve: water use, maintenance, mud, durability, or appearance?
    • How much seasonal lawn care am I realistically willing to keep up with?
    • How will drainage be handled with this option?
    • How will the surface feel and look in the climate where I live?
    • What will long-term upkeep actually look like for this choice?

    What homeowners should remember

    The best choice is usually the one that matches how you actually want to live with the yard. Some properties benefit from real grass, some benefit from artificial turf, and some benefit from reducing lawn area altogether. If you want that broader perspective, read our low-maintenance landscaping guide too.

    Artificial Turf vs Natural Grass Guide for Homeowners related example showing Lawn detail relevant to planning mistakes, prep, and irrigation decisions
    This related lawn detail helps show how site conditions and finish choices can change the homeowner's plan.

    Service guide: The Artificial Turf Installation Guide explains how base prep, drainage, and edge detail shape the finished result.

    More Decision and Planning Guides


  • Grading and Yard Leveling Guide for Homeowners

    Grading and Yard Leveling Guide for Homeowners

    Grading and yard leveling are often the hidden foundation of a successful landscape project. Homeowners usually notice the visible symptoms first: standing water, awkward slopes, muddy lawn areas, patios that feel disconnected from the yard, or low spots that make mowing and drainage harder. But those symptoms often point back to a grade issue underneath the surface.

    This guide explains what grading work usually includes, when yard leveling matters most, and how it connects to drainage, lawn installation, patios, and retaining walls.

    What grading usually includes

    Grading work may involve reshaping the surface, redistributing soil, correcting low spots, adjusting slope near structures, preparing for sod or planting, and coordinating with drainage features. Some projects are simple surface corrections. Others are part of a broader plan that includes walls, patios, irrigation, or lawn replacement.

    Grading and Yard Leveling Guide for Homeowners related example showing Landscape beds and groundcover materials relevant to homeowner quantity planning for mulch, soil, and decorative rock
    This materials example gives homeowners a visual reference for comparing layout, materials, and maintenance tradeoffs before starting the project.
    • Common goals: improve drainage, create flatter usable areas, support hardscape, and make lawn or planting installation more successful.
    • Main performance factors: slope direction, soil stability, compaction, and how the grade connects to surrounding structures and surfaces.

    Why grading matters before other upgrades

    Homeowners often want to jump to the visible layer first, whether that is new sod, a patio, or refreshed planting beds. But if the grade underneath is sending water the wrong way or creating awkward transitions, those upgrades may not perform the way you expect. That is why grading often belongs early in the project sequence.

    Our drainage vs regrading guide is especially helpful if you are trying to decide whether surface shaping, drainage components, or both are the right answer.

    Grading and usable outdoor space

    Yard leveling is not only about solving water issues. It can also make the space more usable. A better grade can improve circulation, make lawn areas easier to maintain, create a cleaner transition into a patio, and reduce the need for constant workarounds in the landscape design.

    Questions to ask before hiring

    • What is the main problem the grading work is solving?
    • How will the new surface direct water differently?
    • Will this grading affect patios, walls, lawn, or irrigation elsewhere on the property?
    • Is compaction or additional base work needed for the next phase?
    • What visible changes should I expect once the work is complete?

    What homeowners should remember

    Good grading often goes unnoticed once the landscape is complete, and that is exactly the point. It should make everything above it work better. When a contractor can clearly explain how the grade affects water, use, and the next phase of the project, you are much more likely to make the right call before money is spent on visible finishes.

    Grading and Yard Leveling Guide for Homeowners related example showing Landscape beds and groundcover materials relevant to homeowner quantity planning for mulch, soil, and decorative rock
    This related materials detail helps show how site conditions and finish choices can change the homeowner's plan.

    Related guide: If soil movement is showing up after storms or on a slope, the Erosion Control Guide for Homeowners explains how stabilization and runoff management often need to work together.

    Related guide: If you are still not sure whether the grade itself is the problem, the Signs You Need Regrading Guide can help narrow the issue before choosing a fix.

    More Planning and Decision Guides

    More Slope and Grade Planning Guides


  • Fire Pit Installation Guide for Homeowners

    Fire Pit Installation Guide for Homeowners

    A fire pit can turn an ordinary patio or backyard into a true gathering space, but it works best when it is planned as part of the larger layout rather than dropped into the yard wherever there seems to be space. Seating distance, surface materials, circulation, lighting, and surrounding planting all affect how comfortable and practical the feature feels once it is built.

    This guide helps homeowners understand what fire pit installation usually includes and what to think through before hiring.

    What fire pit installation usually includes

    Residential fire pit projects may include excavation, base preparation, the fire feature itself, surrounding hardscape, seating layout, and sometimes lighting or low walls. On some properties, the fire pit is the centerpiece of a larger patio plan. On others it is a secondary destination tied to walkways or a backyard seating area.

    • Common formats: built-in masonry fire pits, block systems, gas fire features, and integrated patio/fire-pit zones.
    • Common project needs: proper clearances, stable surrounding surfaces, seating space, and good circulation around the feature.
    • Main planning factors: size, location, fuel type, wind exposure, nearby structures, and how the fire pit fits the rest of the yard.

    Location matters as much as the feature itself

    Homeowners often imagine the fire pit first and the layout second, but the surrounding space is what determines whether the feature feels enjoyable or cramped. A fire pit should work comfortably with seating, access paths, and nearby patios or planting beds. It should also feel appropriately separated from structures and overhanging elements.

    Fire Pit Installation Guide for Homeowners related example showing Landscape beds and groundcover materials relevant to homeowner quantity planning for mulch, soil, and decorative rock
    This materials example gives homeowners a visual reference for comparing layout, materials, and maintenance tradeoffs before starting the project.

    If the feature is part of a larger outdoor-living area, our patio guide is a useful companion.

    Surface and seating planning

    Fire pits work best when the ground around them is stable, intentional, and easy to move through. That usually means hardscape, compacted surface planning, or another defined treatment instead of loose improvised space. Homeowners should also think about how many people the area should comfortably hold and whether the fire feature is a primary gathering area or a secondary accent.

    Questions to ask before hiring

    • How should the fire pit be positioned relative to seating and circulation?
    • What surrounding surface is included in the project?
    • How will the feature connect to nearby patio or pathway areas?
    • What maintenance should I expect for this material and fuel type?
    • How will lighting and surrounding planting be handled so the area feels finished at night?

    What homeowners should remember

    A fire pit is not just an object. It is a gathering zone. The best results come when the feature is planned with the surrounding patio, lighting, and circulation in mind so it feels like part of the landscape instead of a standalone add-on.

    Fire Pit Installation Guide for Homeowners related example showing Landscape beds and groundcover materials relevant to homeowner quantity planning for mulch, soil, and decorative rock
    This related materials detail helps show how site conditions and finish choices can change the homeowner's plan.

    Planning tip: If your fire feature is part of a larger entertaining zone, the Outdoor Kitchen Guide for Homeowners can help you think through layout, utility planning, and how multiple features should work together.

    Compare fuel types: If you are deciding what kind of fire feature fits your yard best, the Fire Pit Gas vs Wood Guide for Homeowners breaks down convenience, atmosphere, and cleanup tradeoffs.

    Cost guide: Homeowners comparing proposals can use the What Affects Fire Pit Cost Guide to connect fuel type and hardscape scope with the budget.

    Quote guide: The fire pit quote guide helps homeowners compare fuel assumptions, hardscape tie-ins, and finish scope across bids.

    Timeline guide: The fire pit timeline guide helps homeowners compare planning, utility coordination, installation, and finish-detail timing.

    Expectations guide: The fire pit expectations guide helps homeowners understand access changes, utility coordination, and finish-work flow during the project.

    Mistakes guide: The fire pit planning mistakes guide helps homeowners catch layout, fuel, and seating mistakes before construction starts.

    Maintenance guide: The fire pit maintenance guide helps homeowners protect the feature, surrounding surfaces, and seasonal usability over time.

    Warning signs guide: The fire pit repair or upgrade signs guide helps homeowners judge surface wear, function problems, and when the feature may need more than routine upkeep.

    More Service Planning Guides

    More Fire Pit Layout and Use Guides