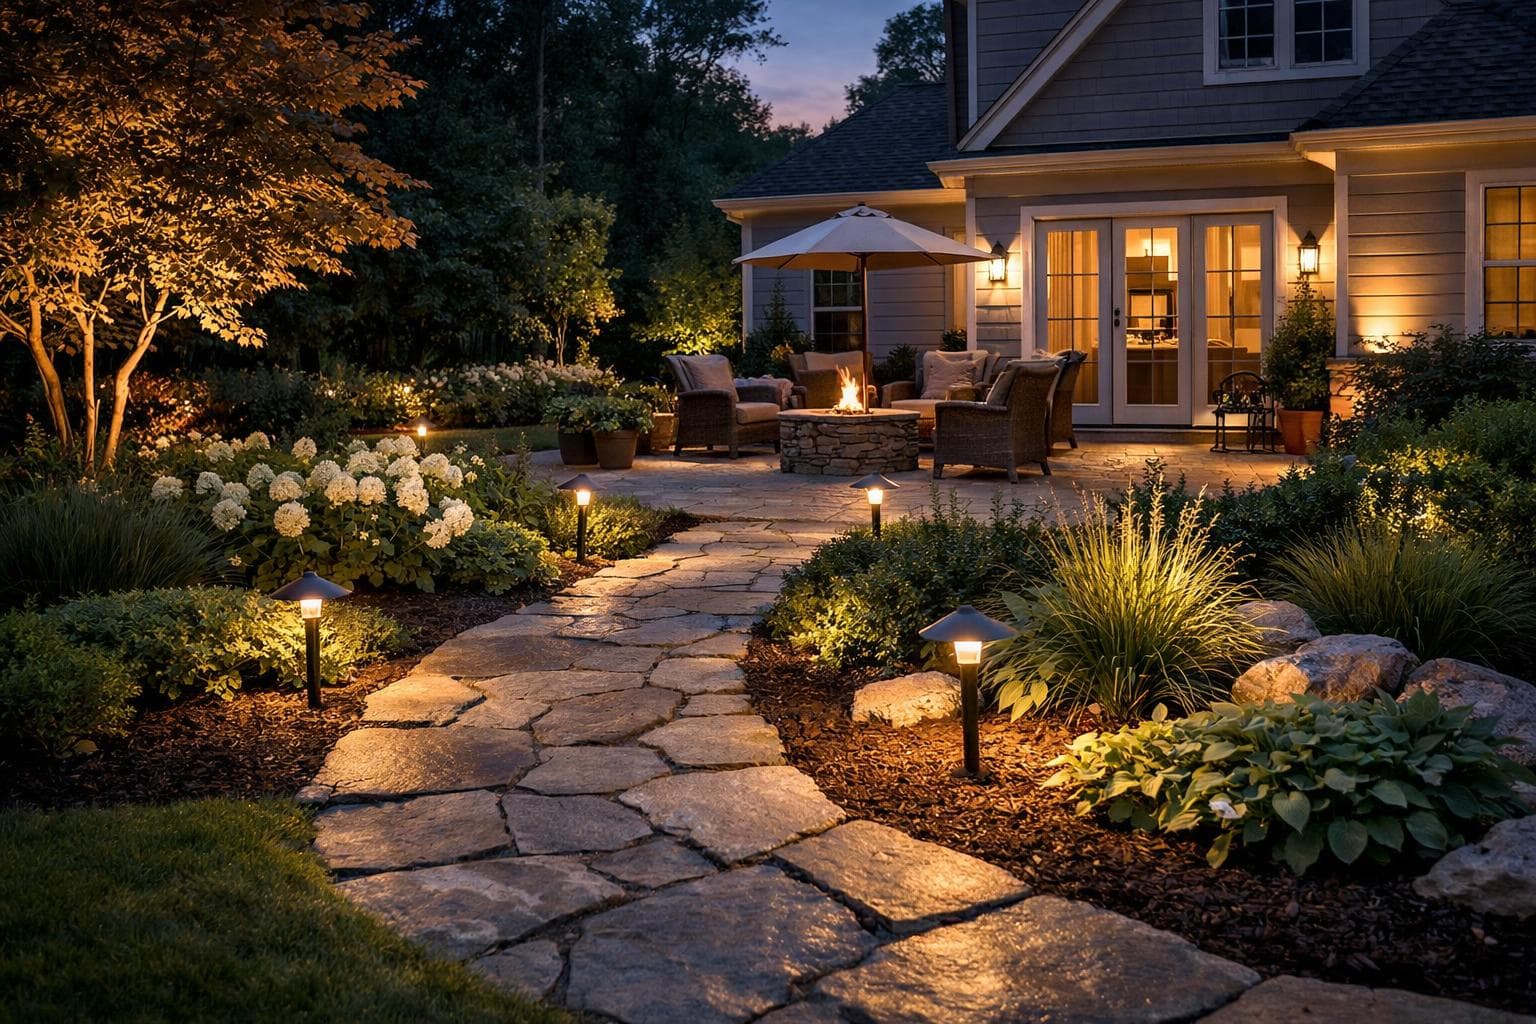
Good landscape lighting does a few jobs well: it lights steps, paths and the front door so people can move safely after dark, then adds a handful of warm, shielded accent lights on the house and a tree or two. For most homes the right tool is a low-voltage (12-volt) LED system on a timer, with solar saved for sunny decorative spots and 120-volt porch, wall and security lights wired by an electrician.
Quick answer: Professionally installed low-voltage LED lighting usually costs about $100–$250 per fixture, or $250–$500+ per fixture for solid brass and high-end design firms. A typical 12- to 20-fixture yard lands around $2,000–$5,000. A DIY kit with six to twelve lights runs about $150–$500, and basic solar stakes cost a few dollars to about $30 each but dim in shade and winter. Size the transformer so the load stays under about 80% of its rating, bury cable about 6 inches deep, use sealed connectors, choose warm white light around 2700–3000K, shield and aim every fixture so it doesn’t glare into eyes or neighbors’ windows, and put the whole system on a photocell and timer.
Landscape lighting types and fixtures compared
Most residential systems mix a few fixture types, each with one job. The installed prices below are rounded US ranges for professionally installed low-voltage LED fixtures, including the fixture, lamp, wire, connections and labor. They vary by region, contractor and how hard your yard is to wire, so use them to sanity-check bids rather than as quotes.

| Fixture type | What it lights | Usual power | Rough installed cost each |
|---|---|---|---|
| Path or area light | Walkways, bed edges, driveway borders | Low-voltage or solar | About $100–$250 |
| Uplight or spotlight | Trees, columns, the house facade | Low-voltage | About $120–$300 |
| Well light (in-ground) | Uplighting from lawn or beds with nothing above grade | Low-voltage | About $150–$350 |
| Wall wash or flood | Broad, soft light on walls, hedges and facades | Low-voltage | About $120–$300 |
| Downlight (tree or eave mounted) | “Moonlight” patterns on patios, lawns and paths | Low-voltage | About $200–$450 (ladder or lift work) |
| Step, deck or hardscape light | Stair risers, wall caps, deck posts | Low-voltage | About $100–$300, more if retrofitted into stone |
| Bollard | Driveways and wider paths | Low- or line-voltage | About $250–$900 |
| String or bistro lights | Patios, pergolas and dining areas | Plug-in 120-volt or low-voltage | Mostly DIY; cost sits in posts, support cable and an outdoor outlet |
| Permanent eave (track) lights | Rooflines, year-round and holiday color | Plug-in 120-volt with a low-voltage controller | Roughly $20–$40 per linear foot installed |
| Wall, porch, post and security lights | Doors, garage, driveway and motion-activated security | Line-voltage (120-volt) | Priced by an electrician; depends on wiring |
Path, up, down and step lights
Path lights are the most overused fixture: a few at turns, steps and the door read better than a matched pair every few feet. Uplights and well lights give the house and trees their nighttime shape. Downlights high in a tree or under an eave cast a soft pool of light with less glare, because the source points down. Step, wall-cap and deck-post lights are the most useful safety lights, and they’re cheapest to add while a patio, wall or deck is being built; our patio and paver guide covers that build sequence.
String lights and permanent eave lights
String lights make a patio feel like a room. Use strands rated for outdoor use, hang them from a tensioned support cable rather than the cord, and plug them into a GFCI-protected outlet. Permanent eave lights are app-controlled LEDs in a track under the roofline; check how the units are sealed, the warranty and your HOA rules before buying. Wall, post and security lights run on 120-volt house power and belong to an electrician. Our landscape lighting cost guide breaks every fixture type down further.
Low-voltage, line-voltage or solar?
Three ways of powering outdoor lights cover almost every home, and most good systems use more than one.

| Low-voltage (12V) | Line-voltage (120V) | Solar | |
|---|---|---|---|
| Power source | Transformer plugged into an outdoor outlet | Household circuit wired by an electrician | Small panel charging a battery in each light |
| Best for | Paths, steps, trees, facades, patios | Porch and wall lights, post lanterns, security floods | Decorative markers in full sun, far corners, renters |
| Brightness | Moderate to strong, adjustable per fixture | Strong | Usually dim; varies with sun and season |
| Install | Shallow cable trench; DIY-friendly | Deeper trench or conduit, permit often required | Push stakes into the ground |
| Typical life | Quality metal fixtures often last many years | Long, like any house fixture | Cheap stakes often 1–3 years; batteries every couple of years |
| Rough cost | About $100–$250 per pro-installed fixture | Electrician quote | A few dollars to about $150 each |
Low voltage is the workhorse: the 12-volt side is low risk, cable is buried shallowly, and fixtures can move as plants grow. Line voltage suits house-mounted and security lights, but a new 120-volt circuit, outlet or buried cable is licensed electrical work in most places and often needs a permit. Solar is cheap and wire-free, but each light can only spend what its small panel collected that day, so output drops in shade, in winter and as the battery ages.
The best solar landscape lights have metal or glass bodies, replaceable batteries and panels facing open sky; separate-panel spotlights help in shade. Keep solar to jobs where dim, variable light is fine. Our low-voltage vs solar landscape lighting comparison covers brightness, lifespan and cost side by side.
Design basics: layering, glare and good-neighbor lighting

Start with purpose, not fixture count: what needs to be visible, what should be highlighted and what should stay dark. A front walk needs wayfinding; a patio needs soft light at the edges, not harsh overhead brightness.
Light in layers
- Safety layer: steps, grade changes, the front door, the house number and the driveway edge. Wire these; don’t leave them to solar.
- Accent layer: one or two trees, the facade and a feature such as a wall or sculpture. Light fewer things well.
- Living layer: the patio, deck or fire pit, often with downlights, step lights or string lights on a separate switch or zone.
Leave dark gaps between layers. Contrast is what makes a lit tree stand out, and an evenly floodlit yard looks flat.
Avoid glare and light trespass
The Five Principles for Responsible Outdoor Lighting from DarkSky International and the Illuminating Engineering Society make a good homeowner checklist: light should be useful, targeted, no brighter than needed, controlled so it’s off when nobody needs it, and warm in color. In practice that means shielded fixtures, glare guards on uplights, aiming light away from eyes, windows and sky, and the lowest output that does the job. A softly lit path is easier to see than one with bright, bare lamps.
Light that spills onto a neighbor’s property is called light trespass. Utah State University Extension’s dark-skies toolkit has a good-neighbor lighting section on trespass and HOA rules. Some towns and HOAs require shielded fixtures or limit uplighting, so check first.
Placement habits that look professional
- Stagger path lights or light the path from beds and trees, instead of lining both edges like a runway.
- Set stakes a few inches into beds, not at the lawn edge where mowers hit them.
- Aim uplights so you see the lit tree, not the lamp, from the street, the patio and the neighbors’ side.
How to plan your system: a decision checklist

Work through these steps before you buy a kit or call for quotes.
- Walk the yard after dark. Note where you trip, squint or can’t read the house number.
- List what needs light and why. Steps, entries and the driveway edge first, then one or two focal trees, then the patio. Our front entry landscaping ideas show how lighting fits at the door.
- Choose power for each item. Low voltage for most, line voltage for house-mounted and security lights, solar for sunny decorative spots (our solar vs low-voltage guide helps decide).
- Find your outlet. No GFCI-protected outdoor outlet with an in-use cover near a transformer spot? Budget for an electrician.
- Count fixtures and watts. Many front yards look complete with 10–15 fixtures; LED landscape lamps draw about 2–8 watts each.
- Sketch cable routes around irrigation lines and future beds. If a patio, walk or driveway is coming, lay conduit under it first; see the driveway guide and the walkway and pathway installation guide.
- Check pools, HOAs and local rules before finalizing fixture locations.
- Decide DIY or pro, and phase it. A small path-and-entry system is a reasonable DIY job; long runs, boring under paving, tree-mounted lights and 120-volt work point to a pro. Size the transformer for the full plan and add accents later.
Transformers, wire and voltage drop

Transformer sizing
The transformer plugs into a 120-volt outdoor outlet and steps power down to about 12 volts. Add up the wattage of every fixture you plan, including later phases, and keep the total at or below about 80% of the transformer’s rating: fifteen 5-watt fixtures (75 watts) need at least a 100-watt unit. Many installers fit 200–300 watts for a typical yard so it can grow. Multi-tap models (12 to 15 volts) let an installer send a little extra voltage down long runs.
Voltage drop and wire size
Voltage drops over distance, so the last lights on a long or crowded run get dimmer. Good installers:
- Use 12-gauge cable for typical runs, 10-gauge for long ones and 8-gauge for very long or heavy runs.
- Keep runs moderate; a common rule of thumb is about 100 watts and 100–150 feet on 12-gauge, splitting anything bigger.
- Use hub layouts, with fixtures branching from one central splice, instead of one long daisy chain.
- Measure voltage at the last fixture on each run and adjust the transformer tap.
Burial depth and pool clearance
Low-voltage cable doesn’t need the deep trench household wiring does. The National Electrical Code (NFPA 70) lists 6 inches as the burial depth for landscape lighting circuits of 30 volts or less using identified cable, and many fixture makers call for 4 to 6 inches. The same code generally keeps standard low-voltage landscape fixtures at least 10 feet from the edge of a pool, spa or fountain unless the equipment is rated for that location. Local rules can differ, so confirm with your building department, and call 811 to have buried utilities marked before anyone digs.

LED color temperature and fixture quality
Color temperature, measured in kelvins (K), describes how warm or cool white light looks. Warm white around 2700–3000K flatters plants and stone and sits close to what groups such as DarkSky recommend. Bluish 4000–5000K light, common on cheap solar stakes and security floods, looks cold and adds glare. Use one color temperature across the system.
Fixture materials
Plastic and thin stamped aluminum are cheapest, but finishes bubble, threads strip and water gets into sockets within a few seasons. Powder-coated cast aluminum is a reasonable middle option. Solid brass, copper and bronze cost the most but don’t rust, weather to a patina and carry the longest warranties, so in coastal, irrigated or wet yards they often cost less over time.
Replaceable lamps vs integrated LEDs
Replaceable LED lamps let you change brightness or beam spread and swap a failed lamp; use lamps the fixture maker approves, since the wrong lamp in a sealed fixture can overheat. Integrated LED fixtures are compact and sealed, but when the diode fails the whole fixture is replaced, so ask how long the LED warranty runs.

Timers, photocells, motion sensors and smart controls
- Photocell: turns lights on at dusk. Cheap, but it needs a clear view of the sky, away from porch lights.
- Photocell plus timer: on at dusk, off at a set time such as 11 p.m. This is the most common setup and a good default.
- Astronomical timer: calculates sunset by date and location, so there’s no sensor to bury in mulch or snow.
- Motion sensors: best for security and utility lights by the garage or side yard. Pair them with a photocell so they only work after dark, and aim them so passing cars and swaying branches don’t trigger them all night.
- Smart or Wi-Fi transformers: zones, dimming, schedules and phone control, usually for a few hundred dollars more than a basic setup.
On larger systems, zones let path and entry lights run all evening while tree and facade lighting shuts off earlier. Solar lights generally run from dusk until the battery is empty.
What landscape lighting costs
These are rounded US ranges that vary by region, yard size, soil, access and fixture quality. They match our detailed landscape lighting installation cost guide.

| Option | What you get | Rough cost |
|---|---|---|
| Basic solar stake lights | Plastic path markers | A few dollars to about $30 each |
| Better solar fixtures | Metal or glass bodies, larger panels, separate-panel spotlights | About $30–$150 each |
| DIY low-voltage kit | Small transformer, cable and 6–12 fixtures | About $150–$500 |
| DIY system with quality parts | Brass or cast fixtures, properly sized transformer, heavier cable | About $60–$200 per fixture in materials |
| Professional low-voltage, mid-range | Design, fixtures, transformer, trenching and setup | About $100–$250 per installed fixture |
| Professional, premium | Solid brass, design-build firm, zoned smart transformer | About $250–$500+ per installed fixture |
| Permanent eave lights, installed | Track-mounted LEDs with app controller | Roughly $20–$40 per linear foot |
Sample system budgets
| Project | Typical layout | Mid-range installed | Premium installed |
|---|---|---|---|
| Front yard, 12 fixtures | 6 path lights, 4 uplights on facade and trees, 2 well lights at the entry | $1,800–$3,500 | $3,500–$6,000 |
| Front and back, 16 fixtures | Front package plus 4 lights on the patio and a focal tree | $2,500–$4,500 | $4,500–$8,000 |
| Front and back, 20 fixtures | Paths, facade, two trees, steps, patio, fence or wall wash | $3,000–$6,000 | $6,000–$10,000+ |
What moves the price
- Fixture quality: solid brass or copper instead of aluminum is the biggest jump.
- Transformer and controls: quality 300-watt stainless multi-tap units often retail for about $150–$450; zones and app control add more.
- Difficult wiring: boring under a driveway or walk, retrofitting into stone, or tree-mounted lights that need a lift.
- New outlets or circuits: licensed electrical work, priced separately.
- Minimums and design: many contractors set a six- to eight-fixture minimum, and some charge for design or a night demo.
Running costs are small: 100 watts of LED fixtures on six hours a night uses about 220 kilowatt-hours a year, usually around $25–$50. Lighting is often added alongside a bigger project; the backyard landscaping ideas and planning guide helps sequence the whole budget.
Installation: what a good lighting job looks like

- A plan before digging: fixture locations and purpose, transformer size and location, and cable routes on a sketch.
- Transformer mounted off the ground on a wall or post, plugged into a GFCI-protected outlet with a weatherproof in-use cover, with spare capacity.
- Cable at depth: about 6 inches, away from beds and lawn you’ll dig or aerate, sleeved under paving. Cable left on the surface under mulch isn’t a permanent install.
- Sealed connections: gel-filled or crimped-and-sealed splices, not push-on pierce connectors, with slack coiled at each fixture.
- Stable fixtures: stakes set firmly in beds and well lights on gravel so they drain.
- Voltage checked at the last fixture on each run, within the fixture maker’s range.
- Night aiming: the installer returns after dark to aim every fixture, ideally with you there.
- Permits where required: new 120-volt circuits, outlets and buried line-voltage cable done by a licensed electrician. See whether your landscaping project needs a permit.
- A cable map you keep, so future edging, planting and lawn aeration miss the cable.
Red flags during installation
- One long run carrying every fixture, with no mention of voltage drop.
- A kit transformer on a large yard, or one sized exactly to today’s fixtures.
- Splices twisted together and dropped into the soil unsealed.
- Bright, cool-white, unshielded uplights aimed at windows or across the property line.
Problems, repairs and when to replace
Most lighting problems trace back to connections, wire size or the transformer, not the LEDs. Iowa State University Extension’s troubleshooting advice starts with the simplest step: check that every transformer and fixture connection is tight.

| Symptom | Likely cause | Usual fix |
|---|---|---|
| Far lights dimmer than near ones | Voltage drop from thin cable, a long run or too many fixtures; sometimes a short | Heavier cable, split the run, raise the transformer tap; check for damaged cable |
| One fixture dim or dead | Failed lamp, dirty lens, water in the socket or a bad connection | Clean or replace the lamp; remake the splice; replace a corroded fixture |
| A whole section flickers or goes out | Corroded or loose splice, cut cable | Remake or repair with sealed connectors |
| Transformer trips or lights come on, then shut off | Overload or a short circuit | Remove fixtures, split the load, upgrade or add a transformer; find the short |
| Lights on in daytime or cycling at night | Photocell shaded, covered or near another light | Move or clear the photocell, or switch to an astronomical timer |
| Solar lights fading early | Shade, dirty panel, aging battery | Clean the panel, replace the battery, move to sun or switch that spot to low voltage |
Repair or replace?
Repair when the cable is sound and the trouble is a few lamps, fixtures or splices. Replace an undersized kit transformer, and swap plastic fixtures for metal as they fail. Converting an older halogen system to LED usually frees up transformer capacity, but have the voltage checked afterward. If a system has unmapped cable, many buried splices and mixed fixtures, a redesign is often cheaper than chasing faults one at a time.
Landscape lighting maintenance calendar
LED systems need little power but regular physical care.

| When | Tasks |
|---|---|
| Spring | Walk the system after dark; straighten and re-aim fixtures; clean lenses; check the timer after the clock change. |
| Summer | Trim plants growing over fixtures; keep sprinklers from spraying the transformer. |
| Fall | Clear leaves from well lights; adjust timers; flag cable routes before aeration or bed work. |
| Winter | Keep snow off solar panels and the photocell; mark path lights near drives and walks so shovels miss them. |
| Every 1–2 years | Check voltage at the far fixtures; open and inspect a few splices; replace failed lamps; replace solar batteries as they fade. |
| After landscaping work | Test every run after planting, edging, paving or irrigation repairs near cable routes. |
Many lighting companies offer annual or twice-yearly service visits; ask what’s included, whether parts are extra and whether they’ll service a system they didn’t install. When repairing sprinklers near cable, the irrigation system guide explains where lines usually run.
Hiring a landscape lighting installer

Lighting specialists and design-build firms focus on placement and night aiming, general landscapers often add lighting to a bigger project, and licensed electricians handle 120-volt fixtures, outlets and circuits. For a larger plan, a lighting specialist plus an electrician for the outlet usually works best.
Questions to ask
- What areas need light most, and why?
- Can I see photos of your finished work after dark?
- How will you control glare into my windows and my neighbors’?
- Will you measure voltage at the last fixture on each run and return after dark to aim?
- What does a service visit cost after the warranty period?
More general questions are in questions to ask before hiring a landscaper.
What a quote should include
- Fixture count by type, with brand, model or series, material and finish.
- Replaceable lamp or integrated LED, plus wattage, beam spread and color temperature.
- Transformer size, brand, location, taps and spare capacity.
- Wire gauge, number of runs, burial depth and any boring under paving.
- Connector type and controls (photocell, timer, astronomical timer or app).
- Whether a new outlet or electrician work is included, and who pulls any permit.
- Separate warranty terms for fixtures, LEDs, transformer and labor.
- A night walkthrough and aiming adjustment after installation.
Compare bids line by line, not just by total. Our guide on how to compare landscaping quotes shows how, and the lighting cost guide has a full quote checklist.
Hiring red flags
- Only a fixture count and a total, with no brands, materials, transformer size or cable gauge.
- Pressure to light everything at once instead of starting with steps, paths and the entry.
- No photos of work at night, and no mention of glare or neighbors.
- A large deposit before fixtures are ordered, or no written warranty.

Problems homeowners run into
The same stories come up again and again in homeowner and installer forums.
- The kit worked until they added lights. A few extra fixtures overloaded the small transformer and the far end dimmed until a second one went in.
- The last lights on a run were dim. Long daisy chains of thin cable were the culprit; heavier cable fixed it.
- Sections went dark after a few seasons. Push-on connectors corroded in wet soil while the LEDs were fine.
- Solar lights were bright in the store and dim at home, because of shade or short winter days.
- Path lights kept getting hit by mowers and trimmers at the lawn edge, and slowly leaned.
- Cable got cut by edgers, aerators and new plantings because it was shallow or unmapped.
- Neighbors complained about uplights and cool-white path lights glaring into windows.
- Permanent eave lights failed early where the eave didn’t shelter them from water, and some HOAs objected to visible wiring.
Frequently asked questions
What are the best outdoor lights for a house?
For most homes, warm white, shielded low-voltage LED fixtures for paths, steps and a few accents, plus line-voltage lights at the doors and motion-sensor lights by the garage. Use solar only for decorative markers in full sun.
Are solar landscape lights worth it?
For small, sunny, decorative spots, yes; models with metal bodies, larger panels and replaceable batteries last longest. For steps and entries, wired low voltage is brighter and more reliable; see low-voltage vs solar.
How much does landscape lighting installation cost?
About $100–$250 per installed fixture for mid-range low-voltage LED work, or $250–$500+ for premium brass and design firms; a typical 12- to 20-fixture yard runs roughly $2,000–$5,000. See the landscape lighting cost guide for sample budgets.
How many landscape lights do I need?
Many front yards look complete with 10–15 well-placed fixtures: steps, paths and the entry first, then a few uplights on the house and a tree or two.
Can I install low-voltage landscape lighting myself?
Yes. Size the transformer for the full plan, use heavy enough cable and sealed connectors, bury cable about 6 inches deep, and leave any new 120-volt outlet to an electrician.
Do I need a permit for landscape lighting?
Plug-in low-voltage systems usually don’t, but new 120-volt outlets, circuits and buried line-voltage cable often do. Check with your building department.
Landscape lighting guide library
Every landscape lighting guide on the site, plus the related guides for the spaces you’re lighting.
Choosing and pricing a lighting system
- Landscape lighting installation cost — per-fixture prices by type, sample 12- to 20-fixture budgets, transformer sizing and what a quote should list.
- Low-voltage vs solar landscape lighting — brightness, lifespan, cost and where each one makes sense.
Planning the spaces you’ll light
- Front entry landscaping ideas — plants, paving and lighting that make the front door easy to find.
- Walkway and pathway installation — building paths with room for lights and cable.
More complete guides
- Patio and paver guide — materials, costs and the build sequence for patios where step and wall lights go in.
- Driveway guide — driveway materials and costs, including when to sleeve cable for edge lights.
- Fence and privacy guide — fences and screens that pair with wall-wash and accent lighting.