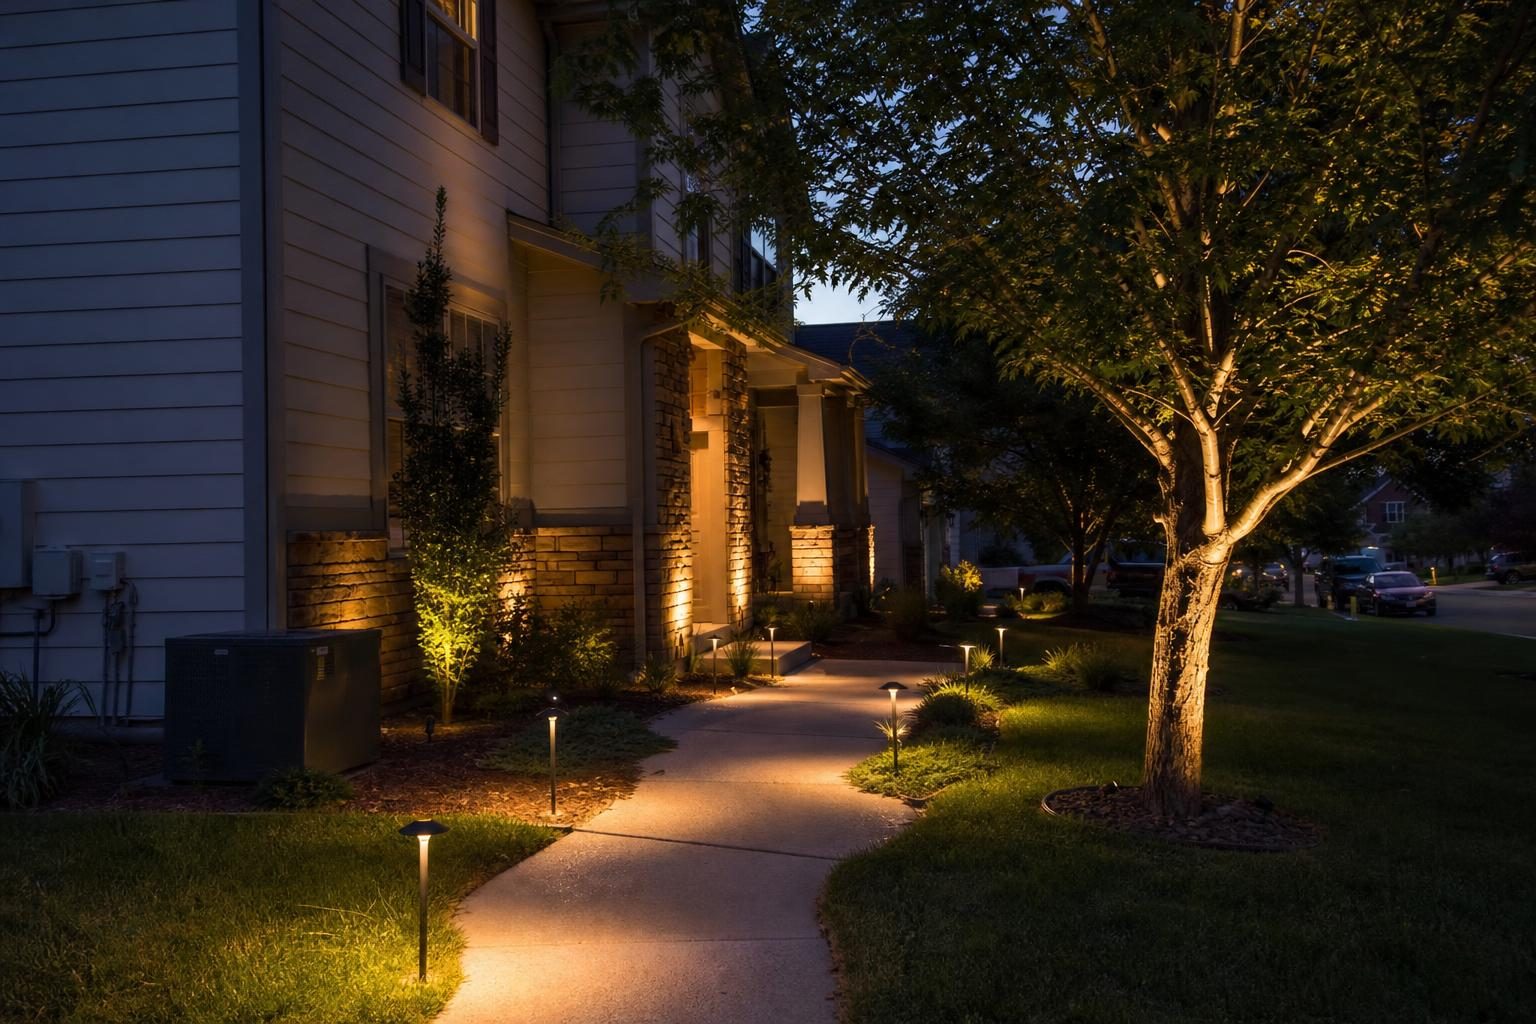
Low-voltage landscape lighting is brighter, more consistent and longer-lasting than solar, but it costs more and needs wire run through the yard. Solar outdoor lights are cheap and take minutes to install, yet they dim or quit early in shade, in winter and as their batteries age. For most homes, low voltage does the real work and solar fills in small, sunny spots where running wire isn’t worth it.
Quick answer: Choose low-voltage (12-volt) lighting for entries, steps, driveways, trees and anything you want lit reliably every night. Expect roughly $100–$250 per professionally installed fixture, or a few hundred dollars for a DIY kit. Choose solar for decorative markers in full sun, rental homes, or spots far from an outlet, and expect to replace cheap units or their batteries every one to three years. Either way, use warm, shielded, aimed light and a timer.
Part of our Complete Landscape Lighting Guide: fixtures, wiring, design, costs and upkeep in one place.
Low voltage vs solar at a glance
| Low-voltage (12V) | Solar | |
|---|---|---|
| Power source | Transformer plugged into an outdoor outlet | Small panel charging a battery in each light |
| Brightness | Moderate to strong, adjustable per fixture | Usually dim; better models are brighter but limited by panel size |
| Consistency | Same output every night, all year | Varies with sun, season, shade and battery age |
| Control | Timer, photocell, app or smart-home control | Mostly automatic dusk-on; limited scheduling |
| Typical life | Quality metal fixtures often last many years; LEDs long-lived | Cheap stakes often 1–3 years; batteries replaced every few years |
| Install effort | Shallow trench for cable, transformer mounting | Push stakes into the ground |
| Best for | Entries, steps, driveways, trees, facades, security | Decorative markers in full sun, far corners, renters |

Brightness and consistency
This is the biggest practical difference, and it is the one homeowners notice first. A solar light can only spend the energy its small panel collected that day. A low-voltage fixture draws what it needs from the transformer, so it is just as bright at 10 p.m. in January as it is in June.
- Shade cuts solar output hard. A panel under a tree, on the north side of the house or behind shrubs may only charge enough for an hour or two of weak light. Lights a few feet apart can behave very differently.
- Winter is the weak season. Short days, low sun angles, cloud cover and snow on the panel all reduce charging. Federal energy guidance has long warned that winter run times can fall by a third to a half unless a solar system is sized for winter. That’s exactly when nights are longest.
Solar works best as a gentle marker that says “the path is here.” If you want to see the steps clearly, read a house number, or light a tree canopy from below, low voltage is the tool for the job. That matters most at the front door; our front entry landscaping ideas show how lighting fits with plants and paving there.

Lifespan, batteries and fixture materials
Solar lifespans vary widely. Some cheap stake lights work for four or five years; many fade within a season or two as plastic yellows, panels cloud over or batteries lose capacity. Rechargeable cells usually need replacing every couple of years, and some models seal the battery in.
Low-voltage systems last longer, but when an older one acts up, the usual culprits are corroded connections, cheap fixtures and nicked cables, not the bulbs.
- Brass, copper and bronze fixtures cost more but resist corrosion and weather, and they darken to a natural patina. They are a common choice in coastal and wet climates.
- Cast aluminum with a good powder coat can be a reasonable middle option. Thin stamped aluminum and plastic tend to fail sooner: stripped threads, bubbling paint, water in the socket.
- Replaceable lamps vs integrated LEDs. Fixtures with a replaceable LED lamp can be repaired. Integrated LED fixtures are sealed units, so when the diode fails the fixture is replaced.
- Connections matter more than people expect. Snap-on “pierce” connectors from entry-level kits are a common failure point. Sealed, gel-filled or properly made splices hold up much better underground.
What each option costs
These are rounded national ranges. Prices vary by region, yard size, soil, access and fixture quality, so use them as a sanity check rather than a quote.
| Option | What you get | Rough cost |
|---|---|---|
| Basic solar stake lights | Light plastic path markers | A few dollars to about $30 each |
| Better solar fixtures | Metal or glass bodies, larger panels, separate-panel spotlights | $30–$150 each |
| DIY low-voltage kit | Small transformer, cable and 6–12 fixtures | $150–$500 |
| DIY system with quality parts | Brass or copper fixtures, properly sized transformer, heavier cable | $800–$2,500 for 10–15 lights |
| Professional low-voltage install | Design, fixtures, transformer, trenching and setup | About $100–$250 per installed fixture |
| Typical pro project | Front yard or entry plus a few trees | $2,000–$4,500; larger designs go higher |
Running costs are small for both. Solar uses no grid power. A modest LED low-voltage system on a timer usually adds only a few dollars a month to the electric bill. For the factors that move a professional price up or down, see our guide to what affects landscape lighting cost.
How low-voltage systems work: transformers, wire and voltage drop

Knowing these basics makes it much easier to judge a quote or a DIY kit.
Transformer sizing
The transformer plugs into a 120-volt outdoor outlet and steps power down to about 12 volts. Add up the wattage of every fixture you plan to use, and pick a transformer so that load is no more than about 80 percent of its rating. For example, 240 watts of fixtures calls for at least a 300-watt transformer. Leave extra headroom if you think you’ll add lights later. Undersized kit transformers are one of the most common reasons people end up buying a second one.
Voltage drop
Low-voltage current loses strength over long wire runs. The farther a fixture is from the transformer, and the more lights on the same run, the dimmer the last ones get. Installers manage this by:
- Using heavier cable (12-gauge is common for typical residential runs; 10-gauge for long ones).
- Splitting fixtures across several shorter runs instead of one long daisy chain.
- Using “hub” layouts where several fixtures connect at a central point.
- Choosing a multi-tap transformer that can send slightly higher voltage down longer runs.
A professional should check voltage at the far fixtures with a meter after installation. Ask whether they do.
Wire burial depth
Low-voltage cable doesn’t need the deep trench that household wiring does. The National Electrical Code lists 6 inches as the burial depth for landscape lighting circuits of 30 volts or less using identified cable, and many fixture makers call for 4 to 6 inches. Local rules can differ, so check with your building department. In practice, 6 inches keeps cable below edgers, aerators and most garden digging. If you plan to aerate the lawn, flag where cable crosses it.
The transformer should plug into a GFCI-protected outdoor outlet with a weatherproof in-use cover. If you don’t have one in the right spot, adding it is a job for a licensed electrician.
Timers, photocells and smart controls
Control is one of low voltage’s quiet advantages. Most transformers include a photocell (turns lights on at dusk) and a timer (turns them off at a set hour). Common setups:
- Dusk to a set time. Lights come on at dark and go off at, say, 11 p.m. This saves energy and is kinder to neighbors and wildlife.
- Astronomical timers. These calculate sunset by date and location, so there’s no photocell to block with mulch or snow.
- Smart transformers and app control. These let you create zones, dim, and set schedules from a phone. Handy for larger systems; not essential for a simple one.
Solar lights generally run from dusk until the battery is empty, with little scheduling control.

Where solar does make sense
Solar isn’t the wrong choice. It’s the right choice for a narrower set of jobs:
- Decorative markers in full sun along a garden bed, a fence line or the edge of a lawn, where dim light is fine.
- Far corners of a large lot where running cable would mean a long trench across the lawn or through a paved driveway.
- Renters or anyone who wants lighting they can take with them.
- Separate-panel solar spotlights, where the panel can sit in the sun while the light sits in shade, bridge some of the gap for accents.
Glare and light pollution
Good landscape lighting is about seeing what you want to see, not about the most lumens. The five principles for responsible outdoor lighting published by DarkSky International and the Illuminating Engineering Society are a useful checklist for any homeowner:
- Useful: light only what has a purpose, such as steps, entries and a few features.
- Targeted: use shielded fixtures and aim them so light lands where you need it, not in eyes, windows or the sky.
- Low level: use the lowest brightness that does the job. A softly lit path often looks better than a bright one.
- Controlled: timers, dimmers and motion sensors keep lights off when no one needs them.
- Warm-colored: choose warm white light (many designers use about 2700K–3000K) rather than the bluish white common on cheap solar lights.
The most common mistake is unshielded uplighting that spills past the tree into a neighbor’s bedroom. Bare, bright path lights also create glare that makes the path harder to see.

Problems homeowners run into
- Solar lights that look great in the store and dim at home. They were placed in partial shade, or it’s November.
- Kit transformers that can’t grow. The starter kit worked, and then three more fixtures made the far end flicker or dim.
- Wire too short. Kits ship with set cable lengths, so long yards end up with extra splices, and splices are where problems start.
- Cut cables. Shallow cable gets sliced by edgers and new plantings. Keep a sketch of the runs.
- Corroded fixtures after a few years. Thin aluminum and plastic fixtures fail sooner than metal ones, especially near sprinklers.
- Stakes in the way. Path lights get hit by mowers and trimmers and slowly lean. Setting them a few inches into the bed instead of at the lawn edge helps, and it’s easiest to plan for when a walkway is being built.
Decision checklist
- List what needs light and why: steps, entries, the driveway edge, a specimen tree, the house number. Our landscape lighting guide covers layout ideas.
- Check sun at each spot. Spots in shade most of the day are poor candidates for solar.
- Find your outlet. Is there a GFCI outdoor outlet near where a transformer could go?
- Pick safety-critical lights first. Steps and entries should be wired, not solar.
- Add up the wattage and size the transformer at no more than 80 percent load, with room to grow.
- Plan cable routes around irrigation lines, future beds and any paving work. If you’re also planning a pergola or patio cover or a deck, run conduit or cable before it’s built.
- Choose warm, shielded fixtures and set a timer.
- Use solar only where its limits don’t matter.

Questions to ask an installer
- How many fixtures, of what material, and are the LED lamps replaceable?
- What size transformer, and how much spare capacity does that leave?
- What gauge of cable, how many runs, and how deep will it be buried?
- Is a new outdoor outlet needed, and who installs it?
- What color temperature are the lights, and are they shielded?
- What warranty covers fixtures, transformer and labor, and what does a service call cost later?
For a broader approach to comparing bids, see how to compare landscaping quotes.
Red flags
- A quote with a fixture count and a total, but no fixture materials, transformer size or cable gauge.
- One long run for every fixture in the yard with no mention of voltage drop.
- Cable laid on the surface and “covered with mulch” as the permanent plan.
- Bright, cool-white, unshielded uplights pointed at the house or across property lines.
- Rewiring a 120-volt outlet or circuit without a licensed electrician where your area requires one.
Frequently asked questions
Are solar landscape lights as bright as low-voltage lights?
Usually not. Most solar path lights are noticeably dimmer, and their output depends on how much sun they got that day. Low-voltage fixtures run at the same brightness every night and can be adjusted.
How long do solar outdoor lights last?
Cheap solar stakes often last one to three years, though some keep going longer. The battery usually needs replacing every couple of years, and some models don’t allow it. Metal and glass solar fixtures with larger panels tend to last longer.
Can I install low-voltage landscape lighting myself?
Yes, many homeowners do. The 12-volt side is low risk. The keys are sizing the transformer correctly, using heavy enough cable, making sealed connections and burying cable about 6 inches deep. Any new 120-volt outlet should be installed by an electrician.
How deep should low-voltage landscape wire be buried?
About 6 inches is the common target, matching code guidance for landscape circuits under 30 volts and most manufacturers’ instructions. Check local rules, since some areas differ.
Is it worth mixing solar and low-voltage lights?
Often, yes. Wire the lights you depend on, like steps, entries and the driveway, and use solar for decorative markers in sunny spots that would be hard to reach with cable.