
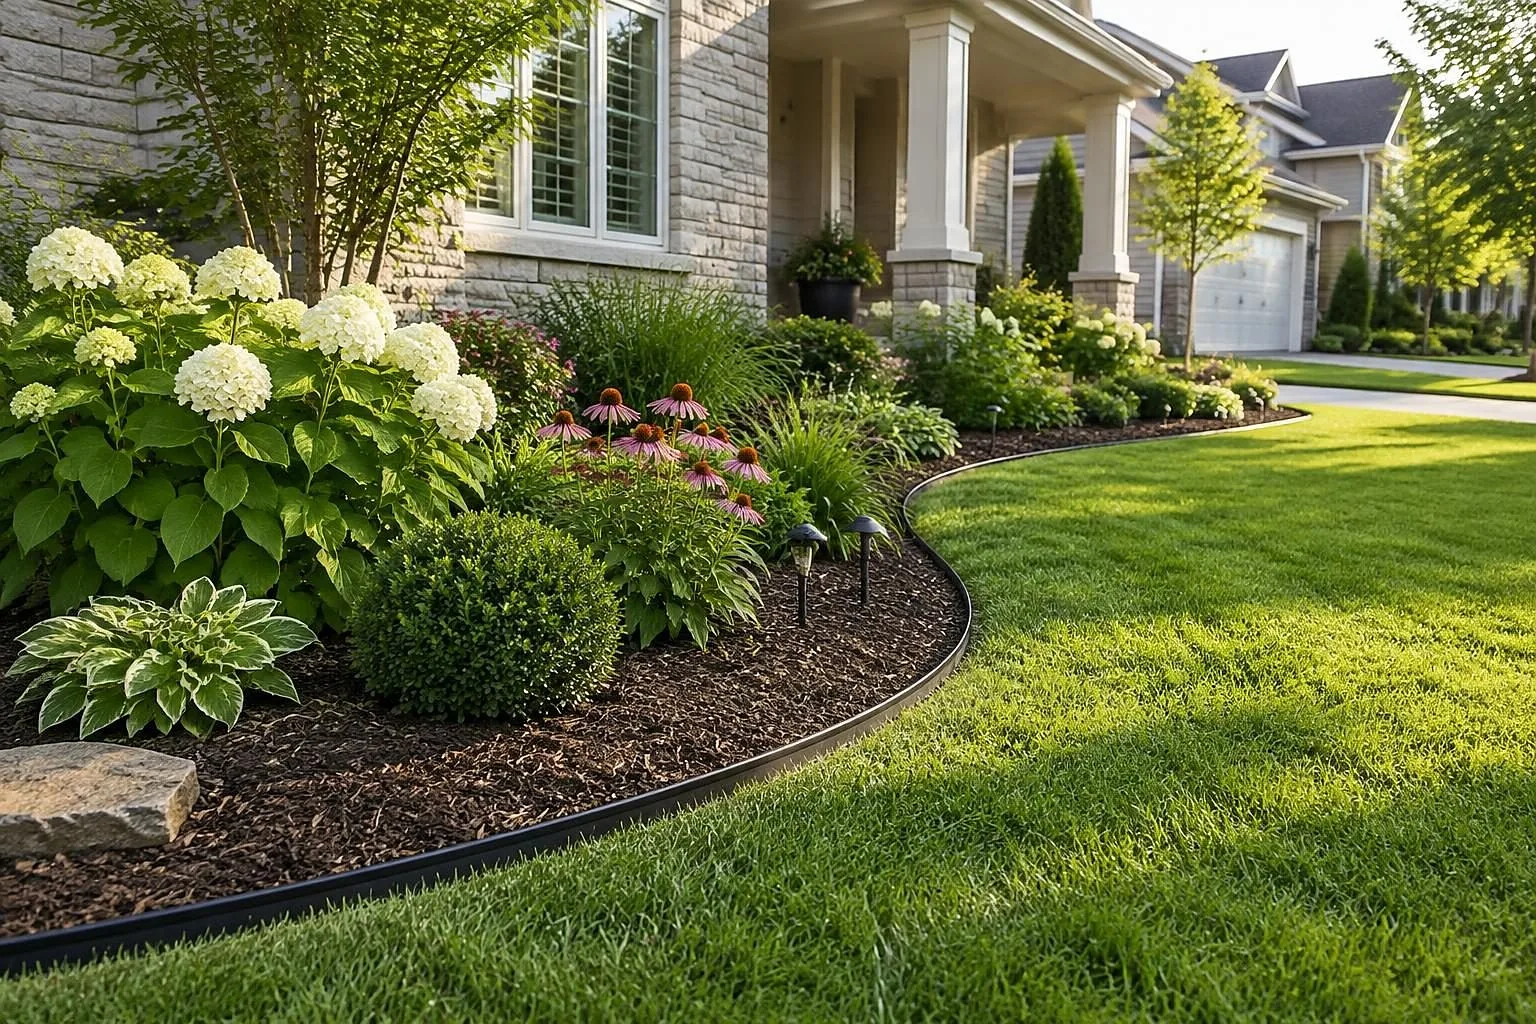
Landscape edging is the line between your lawn and your planting beds. Done well, it keeps grass from creeping into the beds, keeps mulch out of the lawn and makes the whole yard look finished. The choices are what the edge is made of, how deep it goes, and whether you want a raised edge or one you can run a mower over.
Quick answer: For most lawns, steel or aluminum edging set 2 to 3 inches below the soil, with about half an inch showing, is the best mix of cost, looks and lifespan. Plastic is cheapest but tends to heave and wave. Stone, brick and pavers look great and can double as a mowing strip if set flush with the lawn. Poured concrete curbing is the most permanent. A plain spade-cut edge costs almost nothing and is the smart choice for new beds that may still change shape. Installed prices usually run from about $3 per foot for plastic to $12 to $40 per foot for natural stone, depending on your area.
Part of our Complete Garden Bed Guide: planning, flower bed design, soil, edging and care in one place.

Raised, flush or spade-cut: three kinds of edge
Before picking a material, decide what the edge needs to do.
- Spade-cut (natural) edge. You cut a clean vertical line into the turf with a flat spade or half-moon edger and pull the soil back to make a small trench. No material is needed. The University of Illinois Extension says a hand-cut edge about 4 inches deep and 4 inches wide can hold back bluegrass. It needs recutting once or twice a year.
- Raised edge. A strip, stone or curb that sits a little above the soil. It holds mulch in the bed and gives a crisp line, but you will still trim the grass along it with a string trimmer.
- Flush edge, or mowing strip. A band of brick, pavers, stone or concrete set level with the lawn. One mower wheel rides on it, so the blade cuts right to the edge and you skip most trimming.
Along a raised or sloped bed, some yards use both: a raised row to hold mulch and a flush row in front of it as a mowing strip.
Edging materials compared

| Material | Look | Lifespan | DIY friendly | Best for |
|---|---|---|---|---|
| Spade-cut edge | Natural, soft | Recut 1–2 times a year | Yes | New beds, tight budgets |
| Plastic | Visible black rim | A few years, often less in cold climates | Yes | Short runs, temporary beds |
| Steel | Thin, crisp line | Decades if heavy gauge | Moderate | Curves and long runs, driveways |
| Aluminum | Thin line, lighter color | Decades, does not rust | Yes | DIY metal edging |
| Brick or pavers | Classic border | Decades | Yes, but slow | Mowing strips, matching a patio |
| Natural stone | Rustic, heavy | Decades | Yes, heavy work | Informal and cottage beds |
| Poured concrete curbing | Continuous curb | Decades | No, needs a machine | Permanent bed shapes |
| Wood timbers | Warm, rustic | Several years to a decade | Yes | Straight runs, play areas |
Plastic
Plastic roll edging is the cheapest and the easiest to put in, and that is why so many people regret it. It tends to work up out of the ground after freeze-thaw cycles, waves in summer heat, and catches mower blades once it lifts. Illinois Extension calls it the least durable option and notes that round-top styles stay put better than flat ones. If you use it, buy a thick, rolled-top product and stake it closely.
Steel
Steel is what most landscapers install. It bends into smooth curves, takes up almost no bed space and lasts for decades in a heavier gauge (14 gauge or thicker for most yards). It costs more, and a thin top edge can be sharp, so look for a rolled or safety-capped top where kids and pets play. Steel can still be pushed up by frost if it is shallow or understaked. Powder-coated black or brown disappears into mulch; plain steel weathers to a rust-brown that many people like.
Aluminum
Aluminum is lighter, easier to cut and bend, and does not rust, which makes it the friendliest metal for a weekend project. Untreated aluminum has a bright silver look, so most homeowners choose a black or bronze finish.
Brick, pavers and stone
Masonry edges look established and can match a patio or walkway. Set them on a compacted sand or gravel base so they do not sink or tip. Illinois Extension suggests stone edging at least 3 inches thick and 4 inches wide if it needs to stop grass. Grass will grow into the joints, so laying them flush as a mowing strip, or adding a thin metal edge behind them, saves trimming. Our guide to types of pavers covers the units most often used.
Poured concrete curbing
A crew extrudes a continuous concrete curb with a machine, often colored or stamped. It is clean, permanent and stops mulch completely. The trade-off is that it is permanent: changing the bed shape later means breaking it out. Ask how the crew prevents cracking, since cuts or joints along the curb control where cracks form.
Wood
Landscape timbers or ground-contact treated boards are inexpensive and warm looking on straight runs. Anchor them with rebar stakes. Skip old railroad ties, which carry creosote that Illinois Extension warns is harmful to plants.
How to choose for your yard
- New or changing beds: start with a spade-cut edge. Illinois Extension points out that beds often grow over a few seasons, and permanent edging then has to be moved.
- Creeping grasses (Bermuda, zoysia, St. Augustine): choose a deeper barrier, such as 5- or 6-inch steel or aluminum, or a concrete curb. Shallow edging only slows them.
- You hate string trimming: a flush mowing strip of pavers, brick or concrete.
- Cold winters: metal or masonry over plastic, and plan for deeper stakes.
- Slopes: a raised edge to hold mulch, since heavy rain washes it downhill. Our erosion control guide covers steeper ground.
- Next to a driveway or walkway: steel or a concrete curb, which hold up to the occasional tire.
Edging works with mulch, not instead of it. Keep shrub beds at about 2 to 3 inches of mulch and flower beds near 1 inch, so the mulch sits below the top of the edge. Our mulch guide explains depth and type.
What landscape edging costs
These are rounded typical US ranges per linear foot. Prices vary by region, soil, access, how many curves there are and whether old edging has to come out first. Many contractors also set a minimum charge, so short runs cost more per foot.
| Edging type | Materials only (per ft) | Installed (per ft) |
|---|---|---|
| Spade-cut edge | $0 | About $1–$3, often included in bed cleanup |
| Plastic | $0.50–$3 | $3–$8 |
| Steel | $2–$5 | $5–$12 |
| Aluminum | $3–$6 | $6–$14 |
| Brick or pavers | $2–$6 | $8–$20 |
| Poured concrete curbing | Not a DIY item | $5–$18 (stamped or colored at the high end) |
| Natural stone | $3–$10 | $12–$40 |
For a typical front yard with 100 feet of bed line, that works out to roughly $300 to $800 for plastic, $500 to $1,200 for steel, and $800 to $2,000 or more for brick, pavers or curbing. Get two or three itemized quotes; our guide on how to compare landscaping quotes shows what to look for.
How to install metal or plastic edging, step by step

- Call 811 first. Shallow trenching rarely hits utilities, but irrigation lines and low-voltage lighting cables often run along beds. Find and flag them.
- Mark the line. Lay a garden hose for curves or a string line for straight runs. Look at it from the house and the street before you dig. Wide, smooth curves are easier to mow around than tight wiggles.
- Cut the trench. Use a flat spade or half-moon edger to cut straight down on the lawn side, then remove the soil. For 4-inch metal or plastic edging, a trench deep enough to bury about 3 inches of it, leaving roughly half an inch showing, keeps most lawn grass from slipping underneath. Check your product’s instructions, and keep the depth even along the whole run.
- Set the edging. Place it against the lawn side of the trench with about half an inch above the soil, low enough that a mower can pass over it. Join pieces with the connectors or overlap the manufacturer specifies.
- Stake it. Drive stakes on the bed side, at an angle if the product calls for it. Space them about every 3 to 4 feet on straight runs and closer on curves; follow your product’s instructions. Use a rubber mallet or a scrap of wood so you do not bend the top.
- Backfill and tamp. Push soil back on both sides and firm it with your foot so the edge cannot lean. Water it in to settle the soil.
- Mulch the bed. Keep mulch a little below the top of the edge so it does not wash over.
For brick or pavers, dig a wider trench, add 2 to 4 inches of compacted gravel and an inch of sand, then set and level each unit. Setting them flush with the lawn turns them into a mowing strip.

Problems homeowners run into
- Edging pops up after winter. Freeze-thaw pushes shallow or lightly staked edging upward, especially plastic. Deeper setting, more stakes and a heavier product prevent most of it. Press or reset lifted sections in spring.
- Grass grows under or over it. The edge is too shallow, or set too low. Grass can spread about 3 to 4 inches a year into beds, so check the line each spring.
- Wavy plastic. Uneven trench depth plus summer heat. Rolled plastic also tries to keep its coiled shape; letting it lie in the sun before installing helps.
- Mulch spills into the lawn. Mulch is piled higher than the edge, or the bed slopes toward the lawn. Rake it back and keep it below the rim.
- Mower or trimmer hits the edge. It sits too high. Half an inch above soil is usually enough.
- Brick and stone sink or tip. They were set straight on soil. A compacted base fixes it.
- Sharp metal edge. Thin steel can cut bare feet and nick hoses. Choose a rolled top or caps where people walk.
Hiring someone: questions and red flags
Edging is often added to a bed cleanup, mulch delivery or planting job, which can lower the price per foot. Questions to ask:
- What material, thickness or gauge, and depth are you quoting?
- How many feet, and does the price include removing old edging and hauling it away?
- How will you mark utilities and irrigation lines before digging?
- For curbing: how do you control cracking, and what happens if a section cracks in the first year?
- Is mulch, soil or bed cleanup included, or priced separately?
- What warranty do you offer on the work?
Red flags:
- A single lump price with no footage or material named.
- Plastic quoted at steel prices, or no gauge listed for metal.
- No plan for irrigation lines in the bed.
- Pressure to pay in full before the work starts.
Our list of questions to ask before hiring a landscaper covers licensing and insurance.
Upkeep and lifespan
A spade-cut edge needs recutting once or twice a season. Metal and masonry need a spring walk-around: reset anything frost lifted, pull grass from the joints and top up mulch without burying the edge. Illinois Extension suggests fall as a good time to install or replace edging, when the ground is workable and beds are being cleaned up anyway. Heavy steel, aluminum, masonry and concrete curbing can last for decades; plastic and untreated wood usually need replacing far sooner. For how edging fits into a lower-effort yard, see our low-maintenance landscaping guide.
Frequently asked questions
How deep should landscape edging go?
For 4-inch metal or plastic, about 2 to 3 inches below the soil with roughly half an inch showing. Against spreading grasses such as Bermuda, use a 5- or 6-inch product set deeper.
Is metal edging better than plastic?
For most yards, yes. It lasts much longer, holds a smoother line and resists heaving better. Plastic is fine for short or temporary runs where cost matters most.
What is the cheapest way to edge a flower bed?
A spade-cut edge costs only your time. Cut it once or twice a year and keep a little bare soil between the lawn and the mulch.
Do I need edging between grass and mulch at all?
Not always. A well-kept spade edge works on its own. Physical edging earns its cost where grass creeps aggressively, beds slope, or you want a mowing strip.
Can I install edging in the fall?
Yes. Fall is a good time: the soil is easier to dig than in a dry summer and beds are being cleaned up anyway. Avoid frozen or waterlogged ground.
Will edging stop weeds?
It stops lawn grass from spreading into the bed. It does not stop weeds that seed in. Mulch and regular weeding handle those; see our mulch depth guide.